Protein Breakfast Muffins Freezer Friendly For Month Supply
Make a month’s supply of protein breakfast muffins freezer friendly with my simple recipe and prep tips. Batch, freeze, and enjoy grab-and-go breakfasts all month.
What if your morning routine could be both nourishing and effortless? I used to scramble (pun intended) to find balanced options before work—until I cracked the code on batch-cooking meals that stick around. Now, my kitchen stays stocked with nutrient-packed baked goods ready to grab in seconds.
This method isn’t just about saving time. It’s about creating a meal rhythm that works for real life—mornings when you’re half-awake, kids need lunches packed, or your gym bag sits forgotten by the door. I’ve burned my fair share of baked goods testing ratios, but this formula? It’s forgiving, flexible, and designed to fill your coldest appliance with weeks of goodness.
Here’s what we’ll cover:
- Smart batch-cooking strategies (no fancy tools required)
- Core ingredients that keep things moist after thawing
- How to store them so they taste fresh, even on day 28
Think of this as your blueprint for turning 90 minutes of prep into a month of mornings handled. Let’s get your oven preheating.
Learn about The Protein Breakfast Muffins
Ever had one of those mornings where everything goes sideways before you’ve had your first sip of coffee? I’ll never forget the Tuesday my blender died mid-smoothie while my toddler painted the walls with almond butter. That’s when I grabbed my last experimental batch of handheld egg-based bakes from the fridge. Three bites in, I realized: This could change everything.

What makes these handheld wonders work? It’s not fancy equipment—just a trusty muffin tin and a mixing bowl big enough for pancake batter. The magic lies in combining staples you likely have right now:
| Ingredient | Role | Swap Ideas |
|---|---|---|
| Eggs | Binder + structure | Chia gel (for vegan) |
| Oats | Fiber base | Quinoa flakes |
| Greek yogurt | Moisture boost | Applesauce |
I’ve linked my favorite tools below (yes, some are affiliates—my disclosure policy has details). But truly, any oven-safe tin and a fork for mixing will do. This isn’t about perfection; it’s about creating something satisfying between school drop-offs and Zoom meetings.
Now, let’s talk about making your batter work harder. Did you know slightly underbaking them helps maintain texture after freezing? We’ll get into that later—for now, grab that bowl. Your future self will high-five you.
Benefits of a Freezer-Friendly Breakfast
Mornings shouldn’t feel like a race against the clock. I learned this after burning three pans of bacon while simultaneously packing lunches and untangling dog leashes. Having grab-and-go options stashed away transforms chaos into calm—and keeps your sanity intact.

Time-Saving Meal Prep Advantages
Batch cooking these handheld bites takes 45 minutes once. Compare that to scrambling eggs daily while your coffee cools. You’ll reclaim 10-15 minutes each morning—time better spent sipping that latte or tackling your inbox.
I use silicone liners for easy cleanup (no scrubbing stuck-on bits). Swap oil with mashed banana or pumpkin puree. It keeps things moist without greasy residue. Pro tip: Label containers with dates so nothing gets lost in the icy abyss.
Nutrition and Convenience for Busy Mornings
Each bite delivers 12-15 grams of muscle-fueling power, thanks to eggs and Greek yogurt. I add spinach or grated zucchini for sneaky veggie boosts. My kids haven’t noticed—yet.
Crazy week? Thaw overnight or microwave straight from frozen. Pair with fruit or avocado toast for balance. No more drive-thru temptations when you’ve got goodness waiting at home.
Success comes with the right ingredients and methods—this batch cooking routine truly delivers stress-free mornings.
Essential Ingredients & Tools for Success
I once burned a batch because my oven temperature was off—turns out, the right tools matter more than I thought. Let’s talk about building your foundation. What you use determines whether your creations emerge golden or hockey-puck hard.

Key Ingredients and Protein Boosters
Start with quality basics. My batter always includes two secret weapons: shredded sharp cheddar (hello, savory depth) and whipped egg whites for lift. These add staying power without drying things out.
| Must-Haves | Why They Work | Smart Swaps |
|---|---|---|
| Whole eggs | Richness + binding | Flax eggs |
| Cottage cheese | Creamy texture | Silken tofu |
| Almond flour | Nutrient density | Oat flour |
Want extra oomph? Fold in cooked quinoa or hemp seeds. A baker friend once told me:
“Your ingredients should do double duty—flavor and function.”
Sage advice.
Muffin Tin, Cups, and Other Essential Tools
That warped pan from college? Toss it. A sturdy non-stick tin ensures even heat distribution. I prefer standard 12-cup versions—they fit most recipes and freezer bags perfectly.
Don’t skimp on measuring cups. Eyeballing leads to hockey pucks. Silicone liners prevent sticking better than paper. And that dollar-store spatula? Upgrade to a flexible one for scraping every last bit of batter.
Remember: Good tools don’t need to be fancy. They just need to work with you. Now let’s make some magic.
Step-by-Step Guide to Making Protein Breakfast Muffins
Remember that time I forgot baking powder and ended up with hockey pucks? Let’s avoid that. These handheld bites thrive on simplicity—but a few key moves make all the difference. Here’s how to nail your first batch.

Mixing, Whisking, and Preparing the Batter
- Grab your largest bowl. Crack eggs into it first—they’re your glue. Whisk until yolks and whites hold hands.
- Add dry ingredients. I use a 1:1 ratio of oats to almond flour. Sprinkle in spices (think cinnamon, not cayenne… unless you’re bold).
- Fold wet and dry together gently. Overmixing? That’s how you get tough results. Lumps are friends here.
Pro tip: Let batter rest 5 minutes. Hydration matters. Oats soak up moisture like sponges, preventing crumbly disasters later.
Baking Techniques and Timing for Perfect Muffins
Preheat your oven hotter than you think—425°F. Why? A blast of heat gives those tops their Instagram-worthy dome. After 5 minutes, drop it to 350°F. Bake 18-22 minutes total.
Check doneness with a toothpick. If it comes out clean-ish (a few crumbs are fine), they’re done. Underbake slightly if freezing—they’ll finish cooking during reheating.
| Issue | Fix |
|---|---|
| Flat tops | Check baking powder freshness |
| Sticking to liners | Spritz liners with oil first |
| Dry texture | Add 2 tbsp applesauce to batter |
Once, I used honey instead of sugar. Sticky mess. Stick to granulated sweeteners here—they distribute evenly without weighing things down. Your future self will thank you.
Ensure oven temperature is accurate to avoid uneven baking or overbaked muffins. Use a thermometer for precision.
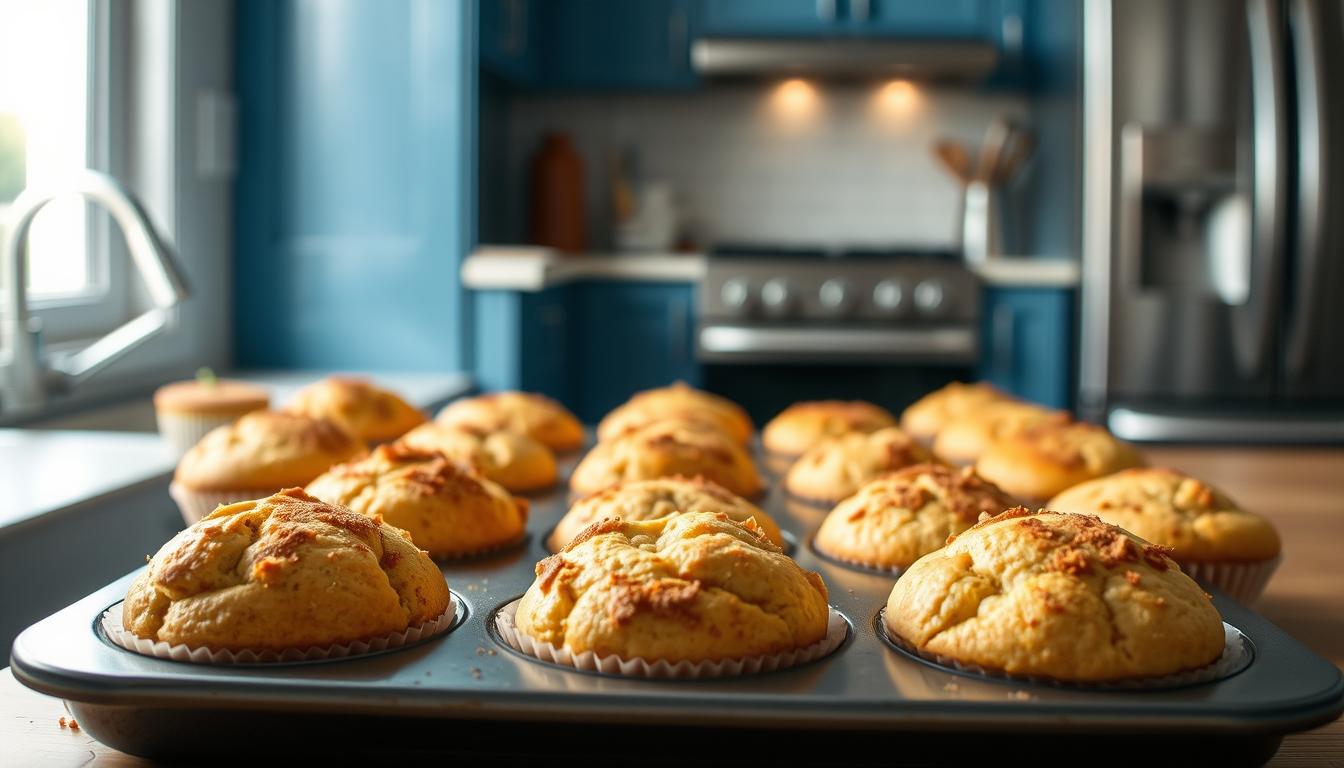
protein breakfast muffins freezer friendly
Ever pressed snooze one too many times? That’s when these golden bites shine. Whip up a batch on Sunday, and you’ve got 28 days of mornings sorted. No more staring into the fridge while your coffee brews.
Here’s the beauty of this no-fuss formula:
- Beat 8 eggs until frothy (creates airy texture)
- Mix with 1 cup cottage cheese + 1/2 cup shredded sharp cheddar
- Fold in 1 cup spinach or diced peppers
- Bake 20 minutes at 375°F
Why does this combo work? The cheese melts into pockets of savory goodness while locking in moisture. Use smoked gouda for depth or feta for tang—both hold up beautifully after thawing.
I once skipped the cheese during a dairy-free phase. Mistake. That extra sprinkle isn’t just flavor—it’s insurance against dry reheated results. Now I keep pre-portioned bags in my icebox labeled “emergency fuel.”
Think of this as your blueprint, not a rigid rulebook. Swap veggies based on what’s wilting in your crisper. Use muffin tins for uniform portions, or bake in a square pan for sliceable squares. Either way, you’re building a safety net for those “where-did-my-morning-go?” days.
Freeze Like a Pro and Reheat Without Regrets
Last month, I pulled out a two-week-old batch only to find sad, frostbitten lumps. Turns out, freezing food isn’t just tossing it in the cold—it’s an art. Let me save you from my mistakes with these kitchen-tested methods.

Locking In Freshness
Cool completely before freezing—steam turns to ice crystals. Wrap each piece in parchment, then seal in airtight containers or heavy-duty bags. Squeeze out excess air to prevent freezer burn.
| Storage Method | Shelf Life | Best For |
|---|---|---|
| Glass containers | 3 months | Preventing odor transfer |
| Freezer bags | 2 months | Space-saving stacking |
| Silicone pouches | 4 months | Portion control |
Label with dates using painter’s tape. I once ate six-week-old bites thinking they were fresh—still tasty, but tracking helps rotate stock.
Reviving Your Bites
Microwave method: Place on a damp paper towel. Heat 45 seconds at 50% power. Let sit 1 minute—the steam reactivates moisture. Oven method: Wrap in foil, bake at 325°F for 12-15 minutes. Both methods preserve that just-baked texture.
“Treat reheating like defusing a bomb—gentle and gradual.”
A chef friend taught me that. Skip the high-power zap unless you enjoy rubbery results. For crisp tops, finish under the broiler for 90 seconds.
Make sure to cool completely before freezing to avoid frostbite and preserve freshness. Follow storage tips closely!
Creative Variations for High Protein Muffins
I once added a tablespoon of cocoa powder instead of cinnamon—turns out, chocolate-zucchini isn’t terrible. But experimenting with flavors? That’s where the real kitchen magic happens. Let’s transform your base recipe into a canvas for endless combos.

Mix-ins, Toppings, and Flavor Enhancers
Why stick to basic when your mix-ins can double as flavor heroes? Try these combos:
- Savory: Sun-dried tomatoes + basil (tastes like pizza in your palm)
- Sweet: Mashed banana + dark chocolate chips (natural sweetness without refined sugar)
- Crunchy: Toasted pepitas + everything bagel seasoning
For sauce lovers: Drizzle sriracha mayo or tahini-maple glaze post-reheating. A local café owner once told me:
“Texture contrast keeps people coming back—think crispy edges against creamy centers.”
| Sweet Boosters | Savory Twists | Protein Hacks |
|---|---|---|
| Date paste | Chopped olives | Collagen peptides |
| Orange zest | Smoked paprika | Chicken sausage crumbles |
Balance flavors like a pro: If using salty add-ins (bacon, feta), cut back on added salt in the batter. For sweeter versions, a teaspoon of sugar enhances fruit notes without overpowering. My go-to savory muffin formula uses roasted red peppers and goat cheese—perfect for afternoon snacks.
Share your wildest creations in the comments! Did you try kimchi-jalapeño? Blueberry-pistachio? Tag me on Instagram—I’ll feature my favorites next week.
Troubleshooting Common Baking Challenges
We’ve all been there—pulling golden treats from the oven only to watch half the batch cling stubbornly to the pan. Last week, I nearly cried when my rosemary-infused creations fused to the tin like edible cement. But here’s the good news: Most baking hiccups have simple fixes. Let’s tackle the top culprits together.

When Your Bakes Stick or Bake Unevenly
First, check your pan’s age. Warped or scratched surfaces cause uneven heat distribution. If your oven runs hot (like mine), reduce the temperature by 15°F and add 3-4 minutes. Here’s my go-to defense plan:
- Grease like you mean it: Melted butter works better than spray—brush it into every crevice. For extra insurance, dust with almond flour.
- Test liners: Silicone cups prevent sticking, but parchment squares work too. Avoid wax paper—it melts into a mess.
- Rotate halfway: Ovens have hot spots. Swivel the pan at the 10-minute mark for consistent browning.
| Issue | Quick Fix | Prevention Tip |
|---|---|---|
| Sticky bottoms | Run a butter knife around edges | Cool 5 minutes before removing |
| Sunken centers | Check egg freshness | Don’t overmix batter |
| Burnt edges | Cover with foil | Use light-colored pans |
A baker friend once told me:
“Your pan is your partner—treat it right, and it’ll return the favor.”
Words to live by. If adjustments fail? Swap 1 egg for ¼ cup mashed banana. The natural sugars help release stubborn bits.
Remember: Baking is part science, part art. Keep notes on what works—your future self will nail it every time.
Avoid overmixing to prevent dense muffins. Let the batter rest to avoid crumbly results—patience pays off.
Meal Prepping Your Month’s Supply
Three weeks into my meal prep journey, I opened my fridge to find six identical containers of soggy spinach bites. Lesson learned: Organization matters as much as the recipe. Now, I approach monthly prep like a chess game—strategic moves ensure every piece stays fresh and flavorful.
Batch Cooking and Storage Strategies
Start with your biggest mixing bowl. Double or triple your recipe to save 45 minutes weekly. Cool baked goods completely before storing—steam trapped in containers creates ice crystals. Here’s how I keep things fresh:
| Storage Option | Max Freshness | Best Use Case |
|---|---|---|
| Glass containers | 5 days (fridge) | Daily grab-and-go |
| Vacuum-sealed bags | 3 months (freezer) | Long-term stock |
| Silicone molds | 2 weeks (fridge) | Portion-controlled snacks |
Label everything with dates using washi tape. I once ate month-old bites thinking they were new—still edible, but texture suffered. A meal prep coach once told me:
“Your future self can’t read minds. Write it down.”
Efficient Organization and Portioning Tips
Use a ¼ cup measure for uniform portions—it speeds assembly and prevents overpacking. Group daily servings in clear bins at eye level. Sundays are my reset days: 90 minutes of baking while listening to podcasts.
Rotate older items to the front weekly. For fridge storage, place a paper towel under containers to absorb excess moisture. Want variety? Assign each shelf a flavor profile—savory left, sweet right.
Remember: Consistency beats perfection. Burnt a batch? Crumble it into yogurt. Forgot to label? Taste-test Fridays become adventure meals. You’ve got this.
There’s a quiet pride in opening your fridge to see neat rows of ready-to-go meals. I felt it last Thursday when my neighbor texted, “How do you always have food prepped?” My secret? Trusting the basics: a sturdy muffin tin, that trusty mixing bowl, and recipes built for real life.
Remember—success starts with your tools. Silicone liners prevent sticking better than parchment. Measuring cups ensure consistent portions. And yes, that non-stick pan matters. I learned this after rescuing egg-based bites from a rusty tin (RIP, breakfast).
Store cooled batches in airtight containers for up to three months. Thaw overnight in the fridge or zap single servings for 45 seconds at 50% power. Add a sprinkle of cheese post-reheating for that just-baked feel.
Want to recreate my go-to formula? Check the affiliate links below for my favorite gear. As my disclosure policy notes, I may earn from purchases—but I only share what’s earned its place in my kitchen.
Every container you fill is a win. It’s proof that even hectic mornings can taste good. Now go stock that freezer—your future self is already cheering.
Protein-Packed Breakfast Muffins
These hearty, freezer-friendly muffins are crafted to fuel your mornings with 12–15 grams of protein per serving. Made with eggs, Greek yogurt, and oats, they're perfect for busy days when you need a nutritious, grab-and-go meal.

Nutrition Information
Equipment Needed
- 12-cup muffin tin
- Mixing bowls
- Whisk
- Measuring cups and spoons
- Silicone muffin liners
Ingredients
-
6 large eggs
-
1 cup Greek yogurt
-
1 cup rolled oats
-
1/2 cup almond flour
-
1/2 cup shredded sharp cheddar cheese
-
1/2 cup cooked spinach, squeezed dry
-
1/4 cup diced red bell pepper
-
1 teaspoon baking powder
-
1/2 teaspoon garlic powder
-
1/4 teaspoon black pepper
-
1/4 teaspoon salt
Instructions

Recipe Video
Smoked Salmon Egg Muffins | Protein-Packed Breakfast
Shake up your Breakfast Routine with these Smoked Salmon Egg Muffins. They’re a Healthy Grab-and-Go Breakfast that’s also Protein-packed, gluten free and low-carb. Make them ahead for a quick and easy morning meal!