No Heat Lunchbox Meals Energy Bites For Afternoon Boost
Boost your energy with our list of top no heat lunchbox meals energy bites. Find simple, healthy recipes for meal prep success.
I’ll never forget the first time I threw together a batch of portable snacks during my son’s soccer season. We needed real fuel that could survive hours in a gym bag without refrigeration—or my forgetfulness. That’s how these little power-packed spheres became our family’s secret weapon against mid-day crashes.
These nutrient-dense morsels require zero cooking and five minutes of active prep. Roll oats, nut butter, and honey form the base, while mix-ins like chia seeds or dark chocolate let you customize flavors. They’re perfect for stashing in lunchboxes, desk drawers, or diaper bags—no microwave required.
Whether you’re juggling back-to-back meetings or shuttling kids to practice, this make-ahead breakfast energy bites formula adapts to your schedule. I’ll walk you through my tested combinations, storage hacks, and how to avoid the sticky pitfalls I encountered during my first batch (spoiler: coconut oil saves everything).
Key takeaways:
- 5-minute prep with pantry staples
- Survives 8+ hours without refrigeration
- Endless flavor variations for picky eaters
Introduction & Overview
Three summers ago, I found myself stranded at a picnic table with melted sandwiches and a group of hangry campers. That’s when I perfected the art of creating shelf-stable snacks that work anywhere. These portable treats became my kitchen lifeline—whether tackling 6 AM commutes or afternoon slumps.
Why Busy Lives Need Smart Fuel
Modern schedules demand real solutions, not Pinterest fantasies. You need food that’s ready when you are, using what’s already in your cupboard. My formula requires just seven common items—rolled oats, peanut butter, honey, and four mix-ins you likely own.
Compare typical options:
| Snack Type | Prep Time | Shelf Life | Customization |
|---|---|---|---|
| Granola Bars | 35 min | 3 days | Limited |
| Yogurt Tubes | 0 min | Chilled only | None |
| Energy Bites | 8 min | 1 week+ | Endless |
See the difference? You’ll spend less time prepping than waiting for coffee to brew. The secret lies in strategic combinations—like using chia seeds to bind ingredients without refrigeration. I’ll show you how to adjust textures for toddlers or gym bags, and why room-temperature storage matters more than you think.
This guide covers everything from choosing nut butters to freezing batches for emergencies. No fancy equipment or last-minute grocery runs required—just smart, sustainable fuel that fits your life.
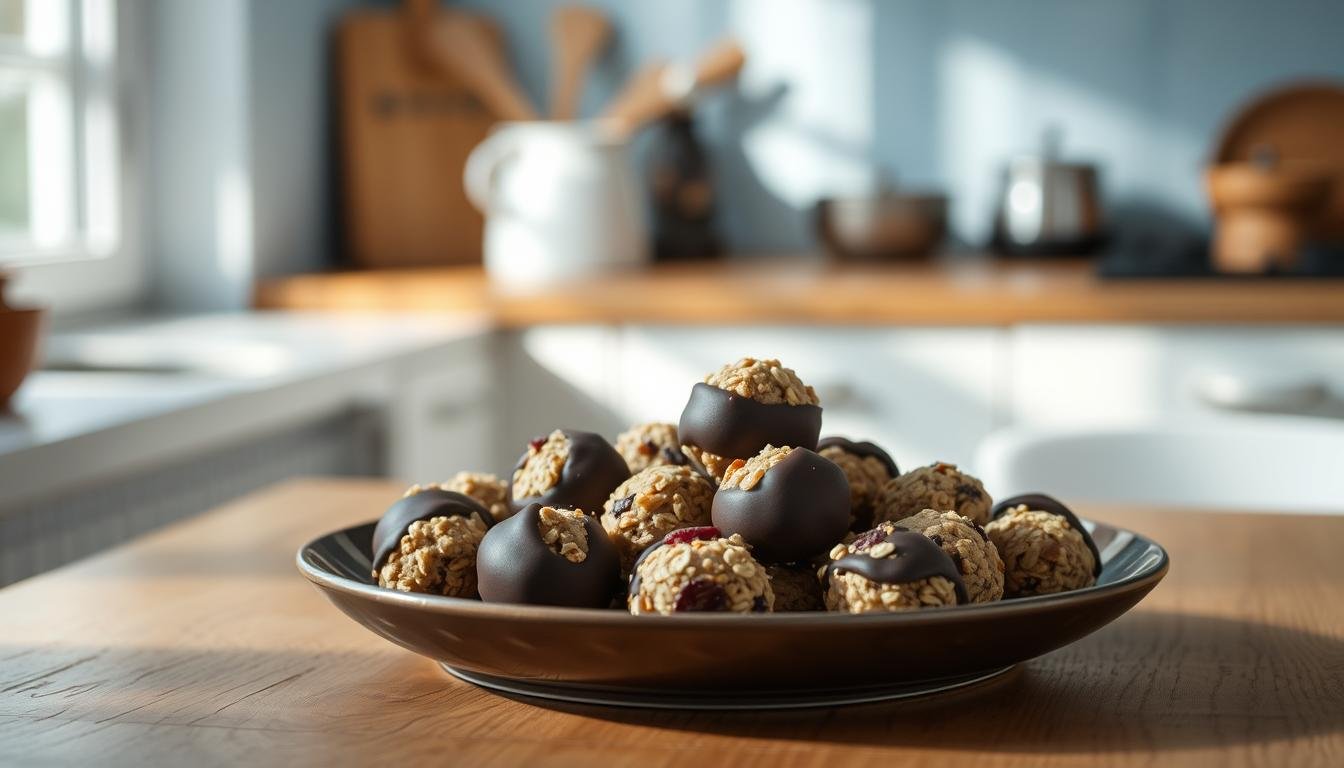
What Are No Heat Lunchbox Meals Energy Bites?

Picture this: a jam-packed afternoon with no time to cook, yet needing something nutritious that’s ready in minutes. That’s where these handheld wonders shine—they’re raw, nutrient-packed spheres designed for real-life chaos. Unlike oven-baked bars that crumble or require cooling, these hold their shape at any temperature.
No-bake energy snacks skip the kitchen heat entirely. Think of them as edible putty—you combine oats, nut butter, and sticky sweeteners, then fold in superfood boosters. The mixture firms up naturally through chilling rather than baking. This means they retain more vitamins and enzymes than their cooked counterparts.
While some recipes suggest using a food processor, I’ve found my hands work better for controlling texture. A processor can overmix ingredients, turning your bites into paste. For chunkier add-ins like coconut flakes or cacao nibs, manual mixing gives perfect results every time.
These treats make energy management effortless. Roll a batch during naptime or between Zoom calls—they adapt to your schedule. Customize flavors based on what’s in your pantry, or swap ingredients for dietary needs. No special equipment, no oven preheating, just grab-and-go fuel that powers through your day.
Essential Ingredients and Flavor Options
Every great snack begins with a solid foundation. I discovered this truth after my first attempt at portable fuel turned into crumbly disaster—lesson learned: ratios matter. Let’s break down the building blocks that transform pantry staples into crave-worthy treats.

Oats, Nut Butters, and Natural Sweeteners
Rolled oats act as your textural backbone. They absorb moisture while keeping bites tender—instant oats turn mushy, trust me. Natural peanut butter (the drippy kind) binds everything together. Pro tip: “If your mixture feels dry, add a teaspoon of melted coconut oil—it’s like edible glue,” as one reader shared after saving her batch.
Honey or maple syrup aren’t just sweeteners—they’re moisture managers. Too little, and your spheres crumble; too much, and they’re sticky. I aim for two tablespoons per cup of oats. For nut-free versions, sunflower seed butter works beautifully. Just note: it darkens the color but adds a lovely earthy taste.
Mix-Ins: Chocolate, Chia, and More
This is where personality shines. Mini chocolate chips satisfy sweet cravings without overwhelming. Chia seeds boost nutrition while helping absorption—they’ll plump up slightly at room temperature. Dried fruit? Chop it small to prevent chewiness. My kids love freeze-dried strawberries for crunch.
Vanilla extract or cinnamon elevate simple combinations. For protein-packed versions, stir in collagen peptides—they blend seamlessly. Remember: mix-ins should total ½ cup per batch. More than that, and your spheres won’t hold shape. Less, and they taste bland.
The magic lies in balancing textures and flavors. My current favorite? Toasted coconut flakes with dark chocolate chunks. It’s like a tropical vacation in snack form—no microwave required.
Preparation Techniques to Perfect Your Bites
Last Tuesday morning taught me a valuable lesson: even simple recipes demand technique. As I rushed to prepare snacks before carpool chaos, my overeager mixing created a crumbly mess. Let me share the exact methods that transform sticky ingredients into flawless spheres every time.

Mixing, Chilling, and Rolling Methods
Start with a large bowl—trust me, you’ll need the space. Combine oats and nut butter first, using a folding motion rather than vigorous stirring. Add sweeteners gradually while scraping the bowl’s sides. “The mixture should resemble damp sand before adding mix-ins,” as one culinary student wisely advised during my test kitchen trials.
Chilling is non-negotiable. Thirty minutes in the fridge firms the dough, preventing squashed shapes. Forgot to plan ahead? Freeze for 10 minutes while prepping lunchboxes. This pause lets ingredients bond without hardening completely.
| Common Mistake | Smart Fix | Time Saved |
|---|---|---|
| Dry mixture | 1 tsp coconut oil | 5 minutes |
| Sticky hands | Damp parchment paper | 3 minutes |
| Uneven sizes | Cookie scoop | 2 minutes |
Tips for Achieving the Ideal Consistency
Use these pro strategies for frustration-free shaping:
- Line your work surface with wax paper—prevents sticking without added oils
- Rotate each ball between palms 3-4 times for smooth surfaces
- Store unfinished dough in the fridge between batches
I learned the hard way: precise instructions matter. Measure mix-ins after chopping, not before. Pack dough firmly into your scoop or hands—air pockets cause crumbling. With these methods, you’ll craft portable fuel that holds its shape from backpack to boardroom.
Time-Saving and Storage Tips
Smart organization turns kitchen chaos into grab-and-go efficiency. Let me share the systems that keep my countertops clear and snacks accessible—even during marathon workdays.

Quick Prep Strategies
Batch-making becomes effortless with these tricks:
- Pre-measure dry ingredients in jars for instant mixing
- Use a cookie scoop from the dollar store—uniform sizes in seconds
- Recruit little hands to roll spheres while you handle sticky tasks
I keep a “snack station” with labeled containers during busy weeks. Sunday nights become assembly lines: mix, chill, portion. Done before my tea cools.
Storing at Room Temperature, Refrigerated, and Frozen
Freshness depends on your container game. Glass jars with silicone seals outperform plastic every time. Here’s your storage cheat sheet:
| Location | Duration | Container Type | Pro Tip |
|---|---|---|---|
| Countertop | 5 days | Airtight glass | Keep away from sunlight |
| Fridge | 2 weeks | Shallow container | Layer with parchment |
| Freezer | 3 months | Reusable silicone bags | Portion in snack-size batches |
Label everything with masking tape and dates. Frozen batches become instant lunchbox heroes—thaw in your bag by noon. Room temperature storage works best for nut-based versions, while fruit-heavy mixes prefer the fridge.
Nutritional Benefits of Energy Bites
During a chaotic grocery run last month, a fellow mom asked me: “How do these little spheres actually fuel us?” Her question made me realize we often grab snacks without understanding their nutritional impact. Let’s explore what makes these portable treats more than just convenient.

Healthy Fats, Proteins, and Fiber Content
Each bite delivers a strategic trio of nutrients. Nut butters provide monounsaturated fats that keep you satisfied for hours—I’ve found almond butter offers 3g per tablespoon. These fats help absorb vitamins while stabilizing blood sugar, preventing that 3 PM energy nosedive.
Rolled oats bring soluble fiber to the party. One batch typically contains 4-5g per serving, which aids digestion and maintains steady energy release. For protein, ingredients like chia seeds and collagen peptides add 5-7g per portion. This combination mirrors the balance found in low-sugar breakfast protein bars, but with customizable ingredients.
Here’s how key nutrients stack up in a standard recipe:
| Nutrient | Per Serving | Function |
|---|---|---|
| Protein | 6g | Muscle repair |
| Fiber | 4g | Digestive health |
| Healthy Fats | 8g | Satiety |
What does this mean for your day? The protein-fiber combo slows digestion, providing lasting fuel between meals. Parents at my cooking workshops report fewer snack requests after introducing these bites—one dad joked they’re “tiny appetite tamers.”
Best part? They taste like indulgence. Dark chocolate adds antioxidants, while honey offers natural sweetness without spikes. You’re not just eating well—you’re savoring every bite.
Customization and Recipe Variations
Last month, a reader emailed me in a panic—her daycare banned nuts, and her usual recipe no longer worked. We brainstormed swaps using her pantry staples, proving these snacks adapt to any dietary need. That’s the beauty of this formula: it’s a blank canvas for creativity.

Smart Ingredient Swaps
Allergies or preferences? No problem. Sunflower seed butter replaces peanut butter beautifully—just add an extra teaspoon of honey to balance its earthiness. For vegan versions, maple syrup works instead of honey. One parent even used mashed banana in a pinch (though they’ll need refrigeration).
Pantry substitutions keep things interesting:
- Quinoa flakes instead of oats for gluten-free needs
- Crushed pretzels or rice cereal for added crunch
- Pumpkin puree mixed with almond butter for fall flavors
| Original | Swap | Adjustment |
|---|---|---|
| Peanut butter | Sunflower seed butter | +1 tsp sweetener |
| Honey | Date paste | Reduce by 25% |
| Chocolate chips | Dried blueberries | Chop finely |
“The coconut oil trick saved my dairy-free batch!” shared a follower on Instagram. When using crumbly ingredients like protein powder, add ½ tablespoon melted coconut oil per cup of dry mix. This maintains the dough’s pliability without altering flavor.
Experiment boldly—swap ¼ cup oats for unsweetened cocoa powder for chocolate lovers. Or mix in matcha powder and white chocolate for an antioxidant boost. Your recipe evolves with your needs, making every batch uniquely yours.
No Heat Lunchbox Meals Energy Bites: Ultimate Recipe Guide

My kitchen counter looked like a science experiment gone wrong—sticky bowls, spilled oats, and a trail of honey drops. That messy afternoon taught me the exact ratios needed for foolproof fuel spheres. Here’s the battle-tested formula that now lives on my fridge, splatters and all.
Gather these ingredients:
- 1½ cups rolled oats (not instant)
- ⅔ cup creamy peanut butter
- ⅓ cup honey or maple syrup
- 1 teaspoon vanilla extract
- ¼ cup ground flax seeds
- ½ teaspoon cinnamon
- Pinch of sea salt
Pulse oats in a food processor until partially broken down—about 10 seconds. This creates better texture without turning into flour. In a large bowl, combine peanut butter and honey first. “The wet ingredients need to become one cohesive glue,” as I tell my cooking class students.
| Step | Action | Time |
|---|---|---|
| 1 | Mix base ingredients | 3 minutes |
| 2 | Fold in mix-ins | 2 minutes |
| 3 | Chill dough | 30 minutes |
| 4 | Portion & roll | 10 minutes |
Stir in oats, flax, and spices until fully incorporated. The dough should hold together when squeezed—if crumbly, add 1 teaspoon water. Chill mixture uncovered for 30 minutes. This rest period lets flavors meld and firms the texture for rolling.
Use a tablespoon cookie scoop for uniform sizing. Roll portions between damp palms to prevent sticking. Store in an airtight container with parchment between layers. They’ll keep at room temperature for five days, though mine never last that long!
“Double the batch and freeze half—future you will send thank-you notes.”
For chocolate lovers: stir in ¼ cup mini chips after chilling. Need crunch? Add toasted coconut or crushed almonds. This blueprint adapts to your cravings while delivering consistent results every time.
Kid- and Allergy-Friendly Snack Options
Navigating snack time with kids often feels like solving a puzzle—especially when allergies enter the mix. When my niece’s school implemented a nut-free policy, we transformed our favorite recipe into something everyone could enjoy. This flexibility makes these treats ideal for classrooms and playdates.
Smart Swaps for Common Allergens
Sunflower seed butter becomes your new best friend in nut-free kitchens. It blends seamlessly with oats and honey, though I add an extra teaspoon of maple syrup to balance its earthy flavor. For grain-free needs, try toasted quinoa flakes—they provide crunch without gluten.
| Allergen | Substitute | Adjustment | Best For |
|---|---|---|---|
| Peanut butter | Sunflower seed butter | +1 tsp sweetener | Classrooms |
| Honey | Date paste | Reduce by 25% | Toddlers |
| Oats | Crushed rice cereal | No change | Gluten-free |
Parents often ask: “Will substitutions change the texture?” Slightly—seed butters make dough stickier. Solve this by chilling portions longer before rolling. For lunchboxes, pack them in parchment paper instead of plastic bags to prevent softening.
Get kids involved by letting them measure pantry staples. Little hands love pressing cookie scoops and sprinkling toppings. One mom shared: “My daughter eats veggies easier when she helps mix spinach puree into the dough!”
These adaptations let you create safe, delicious fuel for every child. Whether dealing with allergies or picky eaters, the recipe remains versatile—no special trips to the store required.
Meal Prep Strategies for Busy Afternoons
Thursday’s 4 PM chaos taught me everything about smart prep. Between client calls and school pickups, I discovered three game-changing tactics that keep my snack stash overflowing without kitchen marathons.
Start with your bowl strategy. Use one large mixing vessel for dry ingredients and a smaller one for sticky components like honey and peanut butter. This prevents constant utensil washing—just wipe the small bowl with a paper towel between batches.
My secret weapon? The food processor pulse. For smoother textures that kids love, blend ½ cup oats into flour before mixing. This creates a dough that holds shape without being gritty. “It’s like edible playdough—sticks together perfectly,” a busy dad from my cooking class remarked.
| Task | Traditional Method | Smart Hack | Time Saved |
|---|---|---|---|
| Mixing | Hand-stirring | Processor pulse | 4 minutes |
| Portioning | Teaspoon measuring | Cookie scoop | 6 minutes |
| Storage | Plastic bags | Stackable containers | 2 minutes |
Batch like a pro:
- Triple the recipe every Sunday—uses one bowl but feeds you all week
- Layer unbaked dough between parchment in containers for grab-and-go rolling
- Freeze portions on sheet pans before transferring to bags
Peanut butter lovers, rejoice! Swap ¼ cup with almond butter for variety while maintaining binding power. Just add a teaspoon of coconut oil if the mixture feels dry. These tweaks let you maintain flavor consistency across batches without monotony.
Your future self will thank you when Wednesday’s exhaustion hits. With these strategies, you’ll spend fewer minutes prepping and more moments savoring—exactly how fuel should work.
Creative Serving Ideas for Energy Bites
Last weekend’s book club reminded me that presentation matters as much as taste. When I casually tossed homemade spheres into a mason jar, my friends mistook them for boutique bakery treats. That’s when I realized these portable snacks deserve their moment to shine.
Pairing with Other Snacks or Beverages
Transform simple spheres into gourmet experiences. Match earthy flavors like almond butter with cold brew coffee—the bitterness contrasts beautifully with sweetness. For fruity versions, pair with herbal iced tea or citrus-infused water.
| Pairing | Flavor Match | Occasion | Prep Time |
|---|---|---|---|
| Dark chocolate drizzle | Peanut butter base | Dessert replacement | 2 minutes |
| Protein powder dusting | Vanilla-chia blend | Post-workout | 1 minute |
| Berry salad side | Coconut-lime bites | Brunch spread | 5 minutes |
Use shallow bowls with textured surfaces for visual appeal. A ceramic dish elevates snacks during meetings, while silicone cups prevent rolling in lunch containers. For kids, let them “decorate” spheres with sprinkles using melted yogurt chips as glue.
Experiment with contrasts: crunchy pretzel sticks alongside soft bites, or tangy Greek yogurt dip for protein-packed dipping. One reader shared: “Drizzling tahini over sesame seed-coated spheres became my office hit!”
Remember—creativity sparks joy. Whether hosting friends or fueling through errands, thoughtful presentation turns practical fuel into daily delight.
We’ve all had those mornings where backpacks zipper and car keys vanish simultaneously. That’s when these handheld heroes shine—they’re pantry-powered fuel ready in minutes. Rolled oats and nut butter form the base, while honey and mix-ins like chia seeds add staying power without fuss.
What makes this formula work? Balance. Peanut butter delivers protein, oats provide fiber, and smart sweeteners keep energy steady. Whether you prefer maple syrup or date paste, the recipe adapts to allergies and tastes. Swap ingredients freely—try mashed banana and cinnamon for a fruity twist.
Busy parents and professionals alike appreciate the make-ahead simplicity. Store batches in glass jars or freezer bags—they’ll survive desk drawers and soccer fields alike. The real magic? Customization. Add dark chocolate for indulgence or collagen for extra protein.
Ready to reclaim your afternoons? Whip up a batch tonight. Share your creations online—we’re all in this hustle together. Here’s to snacks that keep up with life’s chaos, one delicious bite at a time.
Coconut Mango Chia Pudding Parfait
A refreshing and healthy dessert combining creamy coconut chia pudding with sweet mango layers, perfect for a light breakfast or snack.

Nutrition Information
Equipment Needed
- Mixing bowl
- Whisk
- Refrigerator
- Serving glasses
Ingredients
-
1/4 cup chia seeds
-
1 cup coconut milk
-
1 tablespoon maple syrup
-
1/2 teaspoon vanilla extract
-
1 ripe mango, diced
-
2 tablespoons shredded coconut (optional)
Instructions

Recipe Video
Coconut Mango Chia Pudding Parfait Recipe
Learn how to make a delicious Coconut Mango Chia Pudding Parfait, a perfect healthy dessert or breakfast option.