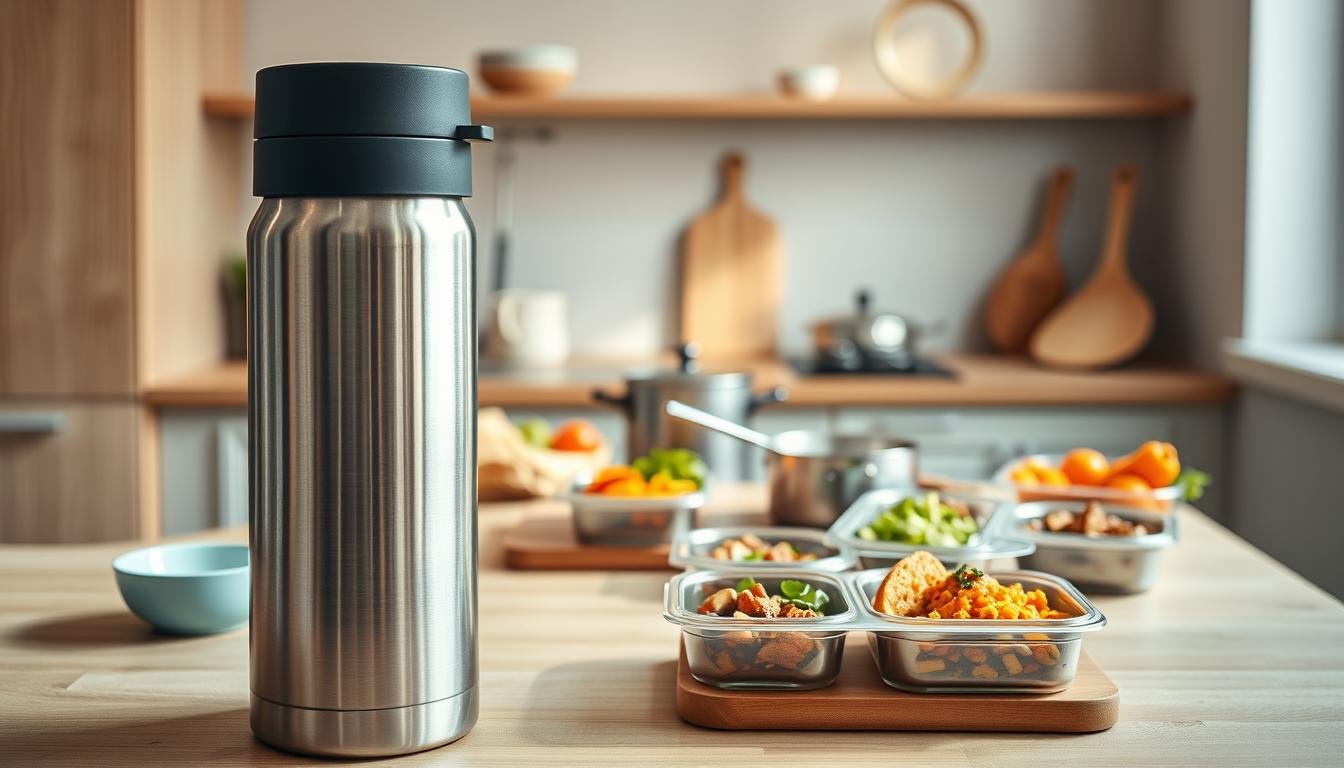
Meal Prep For Work Thermos Meals That Stay Hot
Simplify your workday with meal prep for work thermos meals. Learn how to prepare hot, delicious meals that travel well and fit your busy schedule.
Hikers swear by steaming stews hours into mountain trails. Travelers rely on hearty soups during cross-country road trips. This same temperature magic works beautifully for your midday break – no microwave required.
Portable containers aren’t just for soups anymore. I’ve seen roasted veggies stay warm until 2 PM meetings and quinoa bowls still sizzle after morning commutes. Whether you crave chili or chilled pasta salads, these versatile tools adapt to your cravings while saving precious time.
- Hot dishes stay satisfyingly warm for 6+ hours
- Works equally well for cold-soak grain bowls
- Simplifies morning routines with grab-and-go ease
We’ll explore clever ways to build nourishing dishes that thrive in insulated bottles – from layered textures to flavor-packed sauces. You’ll discover how to transform Sunday cooking sessions into weekday wins, even with picky eaters or tight schedules.
Convenience of Thermos Meals for a Busy Workday
A steaming bowl of soup at your desk feels like a lunchtime luxury, but it’s simpler than you think. Take Dominique, a nurse I coached last year – her thermos food jar turns rushed mornings into midday wins. Instead of cold deli sandwiches, she enjoys herb-roasted chicken thighs with garlicky greens, still fragrant by noon.

Why Hot Meals Make a Difference
Warm dishes trigger comfort and focus. I’ve watched clients power through afternoon slumps with chili that stayed piping hot for 7 hours. Science backs this: insulated containers use vacuum-sealed walls to trap heat, slowing temperature loss to just 1-2°F per hour. That means your curried lentil soup stays above 140°F – safe and satisfying.
The Role of Insulated Containers
These jars aren’t just for liquids anymore. Layer cooked grains, roasted veggies, and proteins like shredded chicken breast for a textured bowl that stays warm. Preheating matters: pour boiling water into the container for 5 minutes before adding food. This trick kept my spicy chicken and rice combinations hot during a 6-hour airport layover last winter.
Whether you’re in cubicles or conference rooms, temperature reliability transforms rushed days. One client told me, “It’s like having a mini kitchen in my bag” – and I couldn’t agree more.
The Benefits of Using a Thermos for Hot & Cold Meals
A construction worker I met last month swears by his thermos for hot dinners on cold job sites. His beef stew stays steaming through morning breaks, while coworkers’ sandwiches wilt in lunchboxes. This dual-temperature magic works equally well for crisp summer salads – no soggy greens by noon.

Retention of Heat and Freshness
Vacuum insulation isn’t just tech jargon. My client Sarah, a hiking guide, serves creamy wild rice soup at 1 PM that’s still 145°F after 12 hours in her pack. Cold-soak grain bowls with pesto pasta stay refreshingly chilled for 24 hours, perfect for beach days. Proper temperature control preserves textures and nutrients better than plastic containers.
- Hot dishes: Maintain safe temps above 140°F for 14+ hours
- Cold items: Stay below 40°F for a full day
- Flavor lock: Prevents taste transfer between layers
Portability and Durability on the Go
These containers survive more than kitchen drops. A teacher friend’s thermos rolled down a stadium staircase last fall – dented but functional, her roasted veggie pasta still warm. Leak-proof seals prevent broth spills in briefcases, while compact shapes fit cup holders during road trips.
Whether it’s curried lentils for snowy commutes or chilled noodle salads for park lunches, reliable temperature control transforms eating anywhere into dining well. As one marathon-training client put it: “My thermos is the MVP of my nutrition game.”
Simple Techniques for Rehydrating & Reheating in a Thermos

I discovered the magic of thermos rehydration during a camping trip last summer. My hiking buddy pulled out perfectly tender couscous with sun-dried tomatoes – no stove required. “Just add boiling water and wait,” she shrugged. That moment changed how I approach portable recipes forever.
Optimal Water Ratios and Soaking Times
Think of your container as a flavor reactor. For dehydrated grains like quinoa or rice, use a 1:1.5 ratio (food to water). Heartier ingredients like lentils need 30% extra liquid to plump properly. Check this quick-reference table:
| Ingredient | Water Ratio | Soak Time | Pro Tip |
|---|---|---|---|
| Instant Rice | 1:1 | 15 min | Add broth for richer flavor |
| Dehydrated Veggies | 1:0.75 | 20 min | Layer under proteins |
| Textured Soy | 1:1.3 | 25 min | Shake container twice |
Step-by-Step Preparation Tips
- Preheat your container with boiling water (2 minutes)
- Drain, then add dry ingredients and measured hot water
- Stir once, seal tightly, and let sit – timer recommended!
Need to delay eating? Increase water by 30% to account for absorption. This trick saved my curried chickpea recipe during a delayed train ride – the sauce thickened perfectly by lunchtime. As one backpacker told me: “Proper ratios turn powder into gourmet magic.”
These methods work wonders for grain bowls, noodle dishes, and even dessert recipes. Last week, I revived freeze-dried mango slices with coconut milk powder – tropical vibes at my desk in minutes. The right way with water transforms humble ingredients into satisfying creations.
Innovative Thermos Cooking Methods for Work and Travel
A yoga instructor once showed me her secret during a retreat: chilled sesame noodles that required zero refrigeration. Her trick? A stainless steel container that doubles as a flavor incubator. This adaptability shines across seasons – think crisp grain salads in July and rib-sticking chowders come January.

Cold-Soak Salads for Warm Summer Days
Sun-drenched afternoons demand refreshing lunches without soggy compromises. Try layering sushi rice with shredded carrots, edamame, and a ginger-miso dressing in your container. Pour chilled broth over the mix 30 minutes before eating – grains plump while veggies stay snappy. One backpacker told me, “It’s like having a sushi chef in my daypack.”
Hot Soups and Stews for Chilly Mornings
Preheat your vessel with boiling water while sautéing aromatics for beef-barley stew. Layer cooked barley first, then tender meat and veggies. The thermal magic melds flavors during transit – my neighbor’s construction crew swears by this method for frosty job sites. “Tastes like it simmered all morning,” he texts me weekly.
- Timing hacks: Cold-soak grains 2 hours max to prevent mush
- Temperature control: Use frozen broth cubes for gradual chilling
- Texture tricks: Keep crunchy toppings separate until serving
These techniques transform ordinary ingredients into climate-smart creations. As a busy mom client recently shared: “My thermos handles snow days and beach picnics better than my kitchen appliances.”
Healthy Thermos Meal Recipes for a Satisfying Lunch
A teacher in my cooking class once confessed she ate cold pizza at her desk for weeks. Now? Her roasted chicken and farro bowls stay warm until recess duty ends. Building nutritious midday options starts with smart layering – think proteins, grains, and sauces that travel well.

Wholesome Chicken & Veggie Options
Try lemon-herb chicken thighs with parmesan zucchini noodles. Sear poultry first for caramelized flavor, then pack over spiralized veggies. Preheating your container keeps this combo steaming – my neighbor’s office mates now ask for her “restaurant-grade” lunches. For vegetarian twists, swap in marinated tofu and roasted broccoli florets.
Delicious Pasta and Rice Dinners
Transform last night’s shrimp scampi into today’s thermos lunch star. Toss whole-grain linguine with garlic butter sauce, then add sautéed shrimp just before sealing. The insulated walls prevent sogginess better than plastic containers. Craving comfort? Try turmeric rice bowls with chickpeas – a make-ahead breakfast favorite that doubles as midday fuel.
- Texture tip: Keep crispy toppings like almonds separate until serving
- Sauce strategy: Use thicker bases like pesto to prevent leakage
- Prep hack: Cook grains in broth for extra flavor depth
These home-cooked creations prove portable food doesn’t mean bland compromises. As one remote worker told me: “My lunch thermos makes my kitchen table feel like a café – minus the $15 price tag.”
Meal Prep for Work Thermos Meals: Inspired Recipes
A mom in my cooking workshop recently shared her victory: “My third grader finally ate spinach – hidden in thermos lasagna!” Family-friendly containers turn lunchboxes into flavor adventures. Let’s explore recipes that satisfy picky palates while keeping grown-ups excited.
Recipes That Unite the Lunch Table
Transform last night’s roasted chicken into today’s star dish. Try this crowd-pleasing formula: base + protein + sauce + crunch. Check our favorite combos:
| Recipe | Kid-Friendly Swap | Prep Notes |
|---|---|---|
| Pork & Cheddar Gemelli | Use turkey bacon | Mix corn kernels into pasta |
| Sweet Potato Mac | Add pureed carrots | Top with crushed pretzels |
| BBQ Chicken Rice | Skip spicy sauce | Pack shredded cheese separately |
One dad told me, “My teens steal my thermos now – their school friends beg for recipes.” The secret? Let them customize. Include small containers for toppings like raisins or hot sauce.
Need vegetarian options? Swap in marinated chickpeas or baked tofu cubes. My neighbor’s daughter devours coconut curry lentils with naan dippers. “It’s like edible playtime,” her mom laughs.
Remember: warmth enhances flavors. Preheating your container makes even simple dishes like cheesy broccoli rice taste richer. For colder items, freeze yogurt tubes overnight – they’ll thaw perfectly by noon.
Thermos Meals for Backpacking, Road Trips, and City Adventures
Last summer, I watched a group of cyclists devour spicy peanut noodles at a mountain summit – their insulated jars steaming in the crisp alpine air. This scene captures the freedom of adventure dining: no soggy wraps or overpriced trailside cafes required. Whether you’re navigating urban streets or forest switchbacks, portable heat retention unlocks flavorful possibilities.

Time-Saving Ideas for On-the-Go Nutrition
Transform basic ingredients into trail magic with smart layering. A backpacker recently shared her favorite hack: dehydrated shrimp linguine that rehydrates with hot broth during lunch breaks. “It’s like having a beachside bistro in my pack,” she laughed. For road trips, try pre-cooked turkey meatballs simmered in marinara – they stay saucy and warm for 9+ hours, perfect with crusty bread rolls.
City explorers love repurposing leftovers. That last bit of grilled salmon? Flake it into a thermos with coconut rice and lime zest. One client told me, “My park-bench lunches now rival my favorite food trucks.” The secret? Treat your container like a flavor incubator – sauces meld, herbs brighten, and textures stay distinct.
Quick-prep ideas make all the difference:
- Batch-cook seasoned grains as a base for multiple meals
- Freeze broth cubes to streamline rehydration
- Pack crunchy toppings separately to maintain texture
These strategies turn rushed mornings into midday wins. As one van-lifer put it: “My thermos handles cliffside picnics and downtown meetings equally well – no restaurant dependency required.”
Budget-Friendly and Time-Efficient Thermos Meal Strategies
A freelance writer once shared how her chili doubled as both dinner and next-day lunch – saving $40 weekly on takeout. Her secret? Strategic repurposing. “Leftovers become gourmet creations with a spoon and creativity,” she told me. This mindset transforms rushed evenings into flavor-packed opportunities.

Quick Recipes Under 30 Minutes
Try this Chili & Rice hack: Sauté ground beef with onion (10 minutes), stir in canned beans and spices. Layer cooked rice first in your container, then top with the sizzling mix. The thermal heat melds flavors while you commute. One client raves: “It’s faster than drive-thrus and tastes homemade.”
| Ingredient | Budget Swap | Cost Savings | Flavor Boost |
|---|---|---|---|
| Ground Beef | Lentils | $3/lb | Add smoked paprika |
| Fresh Herbs | Frozen Cubes | $1.50/batch | Mix with lemon zest |
| Quinoa | Instant Oats | $2.30/pkg | Toast before cooking |
Transforming Leftovers into Gourmet Treats
Last night’s roasted veggies? Toss with barley and broth for a hearty salad upgrade. A spoon of pesto revives baked chicken into Mediterranean bowls. “My kids think I’m a kitchen wizard,” laughs a dad who turns steak scraps into chili mac.
Smart swaps keep costs low:
- Use frozen corn instead of fresh for crunch
- Substitute Greek yogurt for sour cream
- Swap pricey steak with shredded pork shoulder
These strategies work for cubicles and carpools alike. As one teacher put it: “My thermos turns ‘boring leftovers’ into lunchbox excitement – no extra cooking required.”
Expert Tips on Packing and Maintaining Your Thermos
A rushed morning doesn’t have to mean lukewarm disappointment. Last week, a client texted me a photo of her perfectly heated chicken tortilla soup at 3 PM – still steaming after 9 hours in her 24-Ounce Stainless King™ Food Jar. “Tastes like I just ladled it from the pot,” she wrote. That’s the power of strategic packing.
Smart Packing Techniques for Maximum Efficiency
Start with temperature prep: Pour boiling water into your container for 5 minutes before hot dishes, or chill it with ice water for cold salads. This simple step extends heat retention to 14 hours and keeps chilled items below 40°F for a full day. Layer ingredients strategically – place heartier items like grains at the bottom, proteins in the middle, and delicate veggies on top.
Turn last night’s leftovers into today’s gourmet treat by adding fresh elements. Stir crispy bacon bits into reheated potato soup just before sealing, or toss roasted veggies with a quick lemon vinaigrette. One dad in my workshop swears by freezing broth cubes: “They melt during the morning commute, reviving flavors without making rice soggy.”
Cleaning matters as much as packing. Use baking soda paste to remove lingering odors, and always air-dry lids upside down. As one nurse told me: “My thermos stays leak-proof because I never let moisture build up in the seals.”
- Preheat/precool your container
- Pack dense ingredients first
- Add fresh toppings last minute
- Clean with gentle abrasives weekly
With these techniques, even rushed night-before prep becomes a satisfying midday win. Your container isn’t just storage – it’s a flavor-preserving partner that turns basic ingredients into crave-worthy creations.
A parent in my neighborhood recently texted me a photo of her daughter’s empty container – the first time she’d finished her veggies without a fuss. That’s the power of reimagining how we pack flavor and convenience. Whether you’re juggling office deadlines or soccer practices, the right strategies turn rushed mornings into midday wins.
Remember these key things: Preheating containers locks in heat, layering textures keeps dishes exciting, and repurposing leftovers saves both time and money. One teacher told me her “magic jar” lets her enjoy chicken curry during lunch duty, while a cyclist friend swears by his cold-soak noodle salads on summer trails.
Don’t overthink it. Start with one simple recipe this week – maybe a hearty soup or grain bowl. Explore our favorite ideas for busy school nights to spark creativity. Trust me, even basic ingredients become crave-worthy when handled right.
Your container isn’t just a lunchbox upgrade. It’s a ticket to savoring warm flavors anywhere life takes you. So grab that jar, experiment fearlessly, and rediscover the joy of eating well on the go.
Soupe de lentilles aux légumes pour thermos
Une soupe nourrissante et savoureuse, parfaite pour emporter dans un thermos et savourer lors de vos déplacements.

Nutrition Information
Equipment Needed
- Casserole
- Couteau de cuisine
- Planche à découper
- Cuillère en bois
- Thermos
Ingredients
-
1 cuillère à soupe d'huile d'olive
-
1 oignon moyen, haché
-
2 carottes, coupées en dés
-
2 branches de céleri, coupées en dés
-
2 gousses d'ail, émincées
-
1 courgette, coupée en dés
-
1 poivron rouge, coupé en dés
-
200 g de lentilles vertes, rincées
-
1 litre de bouillon de légumes
-
1 boîte (400 g) de tomates concassées
-
1 cuillère à café de thym séché
-
1 cuillère à café de cumin moulu
-
Sel et poivre au goût
-
Jus d'un demi-citron (facultatif)
-
Persil frais haché pour la garniture
Instructions

Recipe Video
Soupe de lentilles aux légumes pour thermos
Découvrez comment préparer une délicieuse soupe de lentilles aux légumes, idéale pour emporter dans un thermos et savourer lors de vos déplacements.