Meal Prep For Work Reheating Tips For Fresh Taste
Get the best meal prep for work reheating tips to maintain flavor and texture. Follow our simple steps for stress-free meal prep.
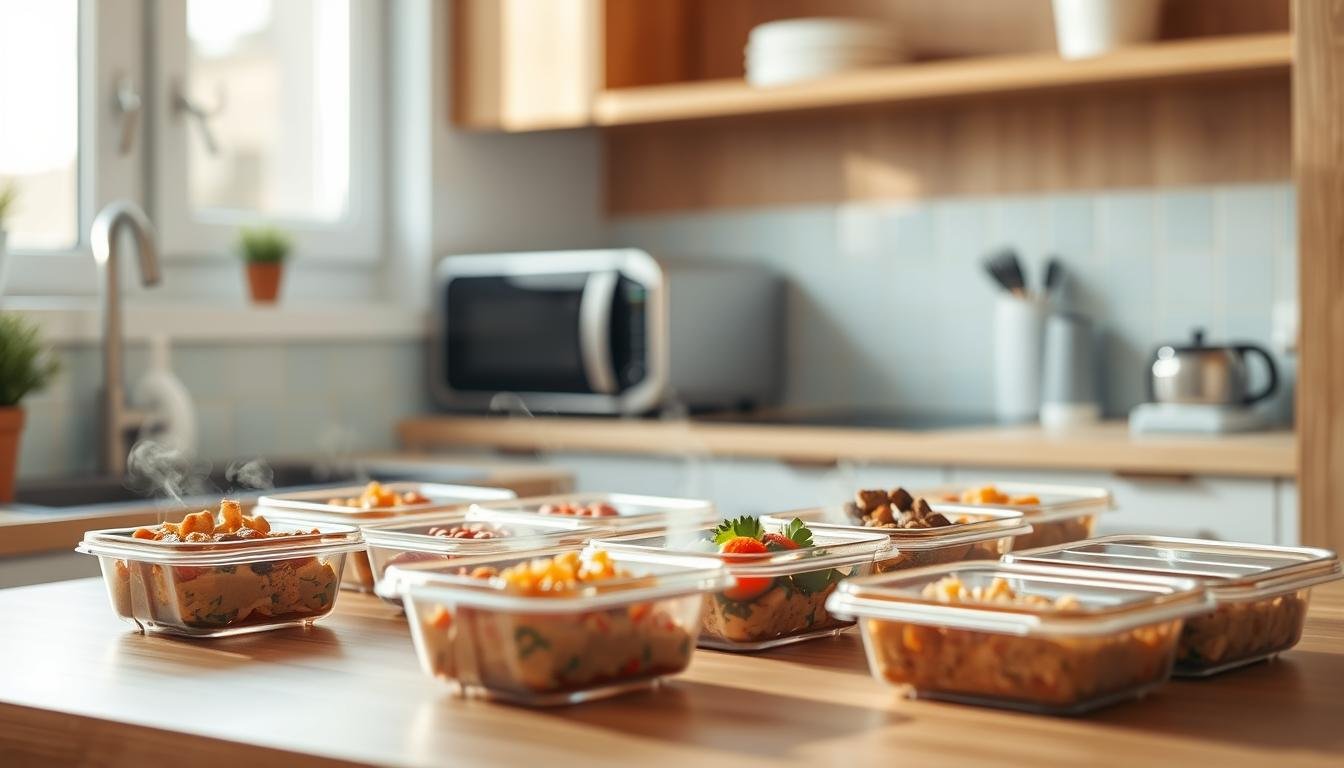
What if your midday lunch could taste as vibrant as when you first packed it? After testing hundreds of storage containers and reheating methods in my Asheville kitchen, I’ve learned one truth: how you warm up your food determines whether it feels like a gift or a chore.
We’ve all faced that sad desk moment – rubbery chicken, soggy veggies, or a formerly crisp grain bowl turned mushy. Research shows 63% of office workers avoid bringing leftovers due to texture disappointments. But here’s the good news: with a few smart tweaks, your prepared dishes can stay lively through Friday.
Through years of balancing family meals and professional kitchens, I’ve found reliable ways to protect flavors and textures. It’s not about fancy tools – just understanding how heat and moisture interact with different ingredients. Let’s explore how to make your freezer your ally and turn lukewarm moments into something worth savoring.
- Reheating methods directly impact flavor and texture quality
- Moisture control prevents sogginess or dryness
- Your freezer extends freshness strategically
Why Proper Reheating Matters for Meal Prep
Reheating isn’t just warming leftovers—it’s culinary chemistry. Think about that crispy chicken from last night turning rubbery, or vibrant veggies becoming limp. The wrong approach undoes all your prep work in seconds.

Avoiding Texture Tragedies
Microwaves zap moisture unevenly, while stovetops can scorch delicate sauces. I learned this the hard way when my garlic butter shrimp turned into chewy hockey pucks. Here’s what works:
- Use damp paper towels over rice or steamed veggies to lock in steam
- Reheat saucy dishes at 50% power in 90-second bursts
- Stir foods every minute to prevent cold spots
Flavor Rescue Mission
Your spaghetti deserves better than lukewarm marinara. Low heat revives dishes gently—try simmering soups on the stove instead of nuking them. For crispy elements like roasted potatoes, skip the microwave entirely. A toaster oven at 375°F for 8 minutes works miracles.
Pro tip: Cool dishes completely before refrigerating. This stops condensation from making your containers soggy before reheating even begins. Small adjustments create big differences—your taste buds will notice.
Meal Prep for Work Reheating Tips: Maximizing Flavor & Texture
Ever wonder why your carefully packed lunch loses its spark by noon? The answer lies in the delicate dance between heat and ingredients. Through trial and error (and a few too many soggy sweet potato fries), I’ve uncovered strategies that keep dishes tasting like they’re fresh from the stove.

Understanding Reheating Challenges
I’ll never forget the time I proudly packed garlic-herb salmon for a workweek—only to find it dried out and flavorless by Tuesday. Most office kitchens lack proper tools, leading to uneven warming. Proteins toughen, grains clump, and sauces separate when rushed. Chef Callie Renner notes: “Undercooking veggies by 20% during prep lets them finish perfectly during reheating.”
Adjusting Time and Temperature for Best Results
Here’s a trick I use weekly: slightly undercook rice and pasta. They absorb leftover moisture when warmed, avoiding mushiness. Compare methods:
| Method | Best For | Temp/Time Tip |
|---|---|---|
| Microwave | Sauces, soups | 50% power + 1-min intervals |
| Oven | Crispy proteins | 325°F + foil tent |
| Stovetop | Stir-fries | Medium-low + splash of broth |
My go-to chicken curry proves this works. Par-cook the veggies and chicken, then let them simmer to perfection in the microwave with a damp paper towel. Texture stays intact, flavors bloom—lunch becomes something to anticipate, not endure.
Microwave and Stovetop Reheating Techniques
Picture this: your creamy pesto pasta from Monday still tastes garden-fresh on Thursday. The secret? Matching your reheating method to your dish’s personality. Through years of reviving leftovers for my family, I’ve found these two approaches deliver consistent results without fancy equipment.

Retaining Moisture with a Damp Paper Towel
Microwaves get a bad rap, but they’re perfect for saucy dishes when used strategically. Here’s my weekday routine:
- Place pasta or grains in microwave-safe containers
- Cover with a damp paper towel (not plastic wrap)
- Heat at 50% power in 90-second bursts
This method saved my lemon-herb chicken recipe from drying out. The towel creates a steam pocket that keeps proteins tender and prevents rice from turning into cement.
Low Heat and Even Distribution
For heartier dishes like stews, I reach for the skillet. Try this approach:
- Warm a non-stick pan over medium-low heat
- Add food in a single layer
- Cover with lid, stirring every 2 minutes
Last week’s beef chili reheated this way tasted better than the original! The gradual warming lets flavors meld while preventing scorching.
| Serving Size | Microwave Time | Stovetop Time |
|---|---|---|
| Single portion | 2-3 minutes | 5-7 minutes |
| Family-sized | 4-5 minutes | 8-10 minutes |
Glass containers work best for both methods—they distribute heat evenly and won’t warp. Remember: gentle heat preserves moisture, while rushing leads to texture casualties. Your future self will thank you at lunchtime.
Oven and Toaster Oven for Crispy Meal Reheating
That crispy eggplant parmesan you lovingly prepped? It deserves better than a soggy microwave fate. When I discovered my kids actually asked for reheated roasted veggies, I realized ovens hold the key to texture redemption.

Tin Foil: Your Crispy-Cozy Blanket
Sheet pan dishes and casseroles thrive with oven revival. Here’s my weekday strategy:
- Preheat oven to 350°F while removing dish from fridge
- Cover with foil for first 10 minutes to lock in moisture
- Uncover last 5 minutes to crisp toppings
Last week’s zucchini lasagna reheated this way tasted fresher than Monday’s dinner. The foil acts like a steam room before the final crunch.
Toaster Oven Magic
For single portions, your countertop hero shines. Those make-ahead breakfast burritos? 375°F for 12 minutes gives golden tortillas without drying eggs. Compare approaches:
| Item | Temp | Time |
|---|---|---|
| Casserole (4 servings) | 325°F | 20-25 mins |
| Single serving | 375°F | 10-15 mins |
Yes, it takes longer than microwaving. But biting into a perfectly crisp chicken pot pie crust? Worth every extra minute. Your fridge becomes a flavor vault when you master this process.
Additional Tips and Tricks for Reheating Meal Prepped Foods
Your meal prep journey doesn’t end when containers hit the fridge. The real magic happens in those final touches that bridge cooking day freshness and lunchtime satisfaction. Let me share the behind-the-scenes strategies I’ve honed through countless kitchen experiments.

The Role of Cooling and Under-Cooking in Meal Prep
I once ruined a beautiful eggplant casserole by rushing the cooling process. Now I always let dishes reach room temperature before refrigerating. This simple step prevents condensation from turning crisp toppings soggy.
Undercooking ingredients by 15-20% works wonders. Roasted vegetables keep their bite, pasta stays al dente, and grains avoid mushiness. Think of your microwave or oven as the finishing chef—it’ll complete the cooking process during reheating.
Choosing the Right Containers and Coverings
Not all containers are created equal. Glass bowls with vented lids maintain texture better than plastic, while foil-wrapped portions protect crispy elements. Here’s my go-to system:
| Food Type | Container | Covering |
|---|---|---|
| Rice/Pasta | Shallow Glass | Damp Paper Towel |
| Roasted Veggies | Metal Tray | Foil Tent |
| Sauces | Mason Jar | Parchment Paper |
For starchy ingredients like rice, add a teaspoon of water or butter before reheating. This trick revived my Thursday lunch quinoa three weeks straight—each batch stayed fluffy as day one. Small adjustments create big texture wins, turning rushed meals into mindful pauses.
Imagine opening your lunchbox to find roasted vegetables with their crisp edges intact and saucy dishes that taste like they just left the stove. That’s the power of intentional heating—a skill anyone can master with this guide. Over years of trial and error, I’ve learned one truth: small details create big differences in preserving texture and flavor.
Whether reviving leftovers in a microwave or crisping proteins in a toaster oven, each method shines for specific dishes. Adjust timings based on portion sizes—single servings need gentler heating than family batches. Undercook grains by 15% during initial cooking to avoid mushiness later. And always let dishes cool completely before refrigerating to lock in freshness for days.
Your kitchen victories matter. Did those spicy dishes stay vibrant all week? Share your wins! While perfecting texture might take years to refine, these practical steps make every lunch feel thoughtfully prepared. Remember: great cooking doesn’t end at the stove—it continues through smart revival techniques.
Now go transform those fridge staples into something worth savoring. Your future self—and your taste buds—will thank you.
Savory Cottage Cheese & Herb Sheet Pan Frittata
A high-protein, veggie-packed frittata baked on a sheet pan—ideal for meal prep or feeding a crowd. Creamy cottage cheese and fresh herbs make it light yet satisfying.

Nutrition Information
Equipment Needed
- Large mixing bowl
- Whisk
- 12x17 inch rimmed sheet pan
- Parchment paper
- Non-stick cooking spray
Ingredients
-
8 large eggs
-
1 cup full-fat cottage cheese
-
1/2 cup grated Parmesan cheese
-
1 cup baby spinach, chopped
-
1 red bell pepper, diced
-
1/2 cup red onion, finely chopped
-
1/2 cup cherry tomatoes, halved
-
1 tablespoon olive oil
-
1 teaspoon dried oregano
-
1/2 teaspoon garlic powder
-
1/4 teaspoon salt
-
1/4 teaspoon black pepper
-
Fresh basil leaves, for garnish
Instructions

Recipe Video
Savory Cottage Cheese & Herb Sheet Pan Frittata Recipe
Learn how to make a delicious and healthy sheet pan frittata with cottage cheese and fresh herbs.