High Protein Lunch Prep Shrimp With Proper Reheating
Boost your meal prep with high protein lunch prep shrimp. Learn how to prepare and reheat shrimp for healthy, grab-and-go lunches.
Busy schedules demand smarter kitchen strategies. As a chef and parent, I’ve found that batch-cooked seafood transforms hectic weeks – especially when it reheats like it’s fresh from the pan. This approach isn’t about fancy techniques. It’s about working smarter with freezer-friendly staples that actually taste good days later.
Frozen peeled shrimp became my secret weapon after one too many chaotic evenings. Their quick thaw time and neutral flavor make them perfect for building multiple dishes. Toss them with olive oil and your favorite spices, then store them ready-to-go. Come lunchtime? Just grab a portion and pair with whatever grains or veggies you’ve prepped.
- Frozen peeled shrimp save 15+ minutes versus handling raw shellfish
- Proper storage and reheating prevent rubbery textures
- One batch creates 3-4 distinct meals (think tacos, stir-fries, or salads)
- Chef Callie’s rule: “Prep your flavor heroes first – proteins anchor everything else”
High Protein Lunch Prep Shrimp
Juggling work and family meals doesn’t have to mean sacrificing flavor or nutrition. I’ve learned that building meals around quick-cooking staples like shrimp creates weeknight wins. These shellfish cook in under 5 minutes – perfect for tossing into grain bowls or salads when time crunches hit.

What makes this approach work? Start with bold flavors. Fresh garlic sizzled in olive oil, zesty lime wedges, and crisp bell peppers transform simple ingredients into vibrant meals. A sprinkle of salt and squeeze of citrus brightens every bite without heavy sauces.
The magic lies in prepping components separately. Cook your rice or quinoa first, then store shrimp seasoned but uncooked. When hunger strikes, just heat a skillet. You’ll have a restaurant-worthy dish faster than delivery apps can load.
This method isn’t about rigid recipes. It’s about creating a flexible system. Later sections will walk through seasoning tricks, reheating hacks, and ways to mix up flavors so you never get bored. Ready to rethink your kitchen routine?
Selecting and Prepping Your Shrimp
Ever had shrimp turn rubbery after thawing? I learned this lesson the hard way during a chaotic week of back-to-back catering jobs. Let’s fix common prep mistakes before they happen.

Thawing Without the Trauma
Cold water baths beat fridge defrosting for speed. Place sealed bags in a bowl, changing water every 15 minutes. Never use warm water – it breeds bacteria and ruins texture.
“Treat thawed shellfish like fresh fish – cook within 24 hours for best results.”
Cleaning Like a Pro
Even pre-peeled shrimp need checks. Run your thumb along the back to find missed veins. Rinse under cold water, then pat dry with paper towels. Moisture is the enemy of crispy sears.
| Thawing Method | Time | Best For |
|---|---|---|
| Cold Water Bath | 20-30 min | Quick prep days |
| Refrigerator | 8-12 hrs | Overnight planning |
Flavor Foundation
Mix 1 tsp garlic powder with ½ tsp smoked paprika for a versatile dry rub. Toss shellfish in olive oil first – it helps spices stick. Wait until cooking to add salt; it prevents moisture loss.
Skillets beat regular pans for quick cooking. Their sloped sides let you shake ingredients without spills. Heat oil until shimmering, then add shrimp in single layers. Two minutes per side keeps them juicy.
Enhancing Your Meal Prep with Protein-Packed Sides
Transform your meal prep from mundane to mouthwatering with the right pairings. The secret to satisfying bowls lies in balancing textures and nutrients – think crunchy veggies against fluffy grains. My kitchen mantra? “Build your base first.”

Grain Game Changers
Cauliflower rice became my go-to after realizing traditional grains left me sluggish. Steam it with turmeric for color, or sauté with garlic for extra flavor. Quinoa works wonders too – its complete protein profile complements shellfish beautifully.
Try this mix-and-match approach:
- Monday: Lemon-herb cauliflower rice + roasted zucchini
- Wednesday: Cilantro-lime quinoa + charred corn
- Friday: Coconut jasmine rice + snap peas
“Rotate three base ingredients weekly to prevent flavor fatigue – your taste buds will thank you.”
| Base | Prep Time | Protein Boost |
|---|---|---|
| Riced cauliflower | 5 min | 2g per cup |
| Quinoa | 15 min | 8g per cup |
| Farro | 25 min | 6g per cup |
Finish bowls with bright accents: diced mango for sweetness, toasted almonds for crunch. A squeeze of lime and pinch of salt can revive any dish. Need variety? Swap sauces – try tahini dressing on Monday, peanut sauce by Thursday.
Step-by-Step Shrimp Cooking Techniques
Ever wonder why restaurant shellfish always tastes better? The answer lies in two factors: heat control and cookware choice. Let’s break down methods that deliver juicy results every time, whether you’re feeding a crowd or just yourself.

Searing Shrimp to Perfection
Pat your peeled deveined shellfish bone-dry – moisture steams instead of searing. Heat olive oil until it shimmers in your pan. Add minced garlic and red pepper flakes, swirling for 10 seconds to infuse flavor. Arrange shellfish in a single layer (no crowding!) and resist stirring for 90 seconds. Flip with tongs, cooking 60-90 seconds more until edges curl slightly. “That sizzle means caramelization,” I tell my cooking students. “Walk away now, and you’ll miss the magic.”
Skillet vs. Pan Methods
Heavy skillets distribute heat evenly, preventing hot spots that overcook delicate seafood. Their sloped edges let you shake ingredients without spills – perfect for tossing with sauce. Standard pans work in a pinch but require constant stirring to avoid uneven cooking.
| Tool | Best For | Cook Time |
|---|---|---|
| Cast Iron Skillet | Crispy sear, high heat | 2-3 minutes |
| Nonstick Pan | Delicate recipes, low oil | 3-4 minutes |
Finish with flaky salt and cracked pepper after cooking – seasoning too early draws out moisture. Let cooked shellfish rest 2 minutes before adding to meal containers. This keeps them tender when reheated later.
Mastering Proper Reheating for Shrimp
We’ve all faced that sad moment: perfectly cooked shellfish turning rubbery after reheating. The difference between a delicious lunch and a disappointing one often comes down to technique. Gentle heat and smart prep preserve both texture and flavor – here’s how to nail it every time.

Retaining Texture and Flavor
Microwave users, listen up. Place your shellfish in a single layer with a splash of broth or lemon juice. Cover with a damp paper towel and heat in 30-second bursts, stirring gently between rounds. Stop at 90 seconds max – residual heat will finish the job.
For pan revival, warm olive oil over medium heat. Add minced garlic and a pinch of pepper, then toss shellfish for 1-2 minutes. “Treat them like delicate herbs,” I tell my meal prep clients. “Warm through, don’t recook.”
| Method | Time | Pro Tip |
|---|---|---|
| Microwave | 60-90 sec | Add citrus juice to prevent drying |
| Skillet | 2-3 min | Use leftover sauce for moisture |
Notice ice crystals? Thaw containers overnight in the fridge first. Stirring halfway through reheating distributes heat evenly. For saucy dishes like curries, simmer on low until just warmed – boiling toughens proteins.
“Overheating is the enemy. If your shellfish feel hot to the touch, they’re done – no matter what the timer says.”
Flavorful Sauce and Seasoning Ideas
What separates good meals from unforgettable ones? Often, it’s the sauce. During a chaotic catering event last summer, I watched a simple citrus glaze transform basic ingredients into client favorites. The right seasoning blend acts like culinary alchemy – turning everyday dishes into crave-worthy creations.

Lime, Garlic, and Honey Infusions
Combine 2 tbsp lime juice with 1 minced garlic clove and 1 tsp honey for a bright finishing drizzle. This trio balances tangy and sweet – perfect for grain bowls or tacos. Add a pinch of red pepper flakes if you enjoy subtle heat.
Sesame Oil and Chili Variations
Whisk 1 tbsp toasted sesame oil with ½ tsp chili powder and ¼ tsp salt. Toss cooked shellfish in this blend just before serving. The nutty aroma pairs beautifully with crisp bell peppers or snap peas.
| Sauce Base | Prep Time | Best Pairings |
|---|---|---|
| Citrus-Garlic | 3 min | Quinoa, roasted veggies |
| Sesame-Chili | 2 min | Stir-fries, slaw mixes |
Adjust seasoning gradually. Taste after each addition – you can always add more, but you can’t remove excess salt or spice. For richer flavor, let sauces sit 10 minutes before using.
“Treat sauces like accessories – change them to refresh your meal rotation without overhauling your whole recipe.”
Experiment by adding cooked shellfish to different bases throughout the week. Monday’s lime blend could become Wednesday’s marinade with extra garlic powder. Keep a squeeze bottle handy for last-minute flavor boosts.
Creative Recipe Variations for Shrimp Meals
Your kitchen becomes a global bistro when you reimagine basic ingredients. That batch of seasoned shellfish you prepped? It’s just waiting to star in new roles. I discovered this during a week when my family begged for variety – same protein, five different cuisines.

Taco Bowls, Risottos, and Beyond
Monday’s zesty taco bowl starts with a base of cilantro-lime rice. Top with warmed shellfish, pickled onions, and a dollop of Greek yogurt spiked with lime zest. For Wednesday’s risotto, stir cooked grains into simmering broth and fold in your seafood during the last two minutes. The starch creates a creamy texture without heavy cheese.
Try these mix-and-match ideas:
- Mediterranean: Quinoa + roasted red peppers + feta + lemon-garlic oil
- Asian-inspired: Sesame broccoli slaw + chili-lime seasoning + crushed peanuts
- Comfort food: Parmesan cauliflower rice + cherry tomatoes + basil
“Change your sauce, change your meal. A simple swap can transport your taste buds across continents.”
| Dish | Key Ingredients | Prep Time |
|---|---|---|
| Cajun Bowl | Bell peppers, andouille sausage, Cajun seasoning | 12 min |
| Lemon Risotto | Arborio rice, white wine, lemon zest | 25 min |
Keep weeknight dinners exciting by rotating three elements: grains, veggies, and sauces. A batch of cooked shellfish becomes tacos with corn tortillas and avocado crema, or transforms into fried rice with scrambled eggs and peas. The secret? Start with bold seasonings and let your cravings guide the rest.
Optimizing Shrimp Meal Prep for Busy Weeks
Wednesday’s lunch rush hits differently when your fridge holds ready-to-assemble components. My catering career taught me this truth: Successful batch cooking requires equal parts strategy and simplicity. Start by cooking two pounds of seasoned shellfish – enough for four meals without flavor monotony.
Batch Cooking and Storage Solutions
Divide cooked grains and veggies first. I use 1-cup containers for individual portions – they stack neatly and prevent overeating. Keep sauce separate in small squeeze bottles or jars to maintain crisp textures.
| Container Type | Best For | Fridge Life |
|---|---|---|
| Glass with divider | Sauces/dressings | 5 days |
| Shallow rectangle | Layered bowls | 4 days |
Brown rice lovers – cook it in broth for extra flavor. Store grains flat in gallon bags to save space. When assembling, place chilled ingredients at the bottom, with room-temperature items on top for even reheating.
Follow seasoning instructions precisely. A client once doubled garlic powder in her recipe, creating an overpowering batch. “Measure twice, mix once” became our kitchen mantra. For spicy variations, add chili flakes during assembly rather than storage.
Label containers with dates and flavor profiles. Sunday’s lemon-herb batch becomes Tuesday’s tacos with avocado and quick-pickled onions. Rotate three base ingredients weekly to keep taste buds engaged without extra work.
Balancing Nutrition with Whole Foods
What does a truly satisfying meal look like? In my kitchen, it’s a colorful plate where every component serves a purpose. Think juicy citrus-marinated shellfish nestled beside fiber-rich grains and crisp greens – a trio that fuels busy days without weighing you down.
Incorporating Veggies, Grains, and Leafy Greens
Start with your base. Quinoa and couscous work overtime, offering plant-based protein and quick prep times. Toss cooked grains with olive oil to prevent clumping, then layer with roasted veggies like Brussels sprouts or spiralized zucchini.
“A squeeze of citrus isn’t just about brightness – it helps your body absorb nutrients from greens.”
| Grain | Fiber (per cup) | Prep Time | Flavor Pairing |
|---|---|---|---|
| Quinoa | 5g | 15 min | Lime + cilantro |
| Couscous | 2g | 5 min | Lemon zest + parsley |
| Brown rice | 3.5g | 25 min | Garlic + basil |
Build your bowl with texture in mind. Massaged kale holds up better than spinach when stored. Add crunch with sliced radishes or toasted pepitas. For dressings, whisk olive oil with Dijon mustard – it clings to ingredients without pooling.
Portion smartly using divided containers. Fill one-third with grains, one-third with veggies, and the rest with cooked shellfish. Keep dressings separate until serving. This method keeps meals fresh for four days while preventing sogginess.
Embracing International Flavors in Shrimp Dishes
Your spice rack holds passports to global kitchens. During a culinary tour last year, I discovered how simple swaps can reinvent basic ingredients. A pinch of smoked paprika becomes Spain, while lemongrass and fish sauce transport you to Thailand – all without leaving your countertop.
Italian-inspired dishes shine with garlic and basil. Toss cooked shellfish in olive oil with sun-dried tomatoes and a splash of white wine. Serve over quinoa for a protein-rich twist on risotto. Asian variations? Swap rice vinegar for lemon juice and add a dash of chili crisp.
“Fusion isn’t about perfection – it’s about playful experimentation. Mix Korean gochujang with Mexican lime crema and watch magic happen.”
| Cuisine | Key Ingredients | Prep Time | Sauce Base |
|---|---|---|---|
| Mediterranean | Olives, feta, oregano | 12 min | Yogurt-tahini |
| Cajun | Andouille, bell pepper | 15 min | Remoulade |
| Thai | Lemongrass, coconut milk | 18 min | Peanut-lime |
Start with a base recipe, then layer flavors. Monday’s lemon-garlic shellfish becomes Wednesday’s tacos with chipotle mayo. Keep cooked grains like jasmine rice or couscous ready – they anchor any global meal. Rotate sauces weekly to keep your taste buds traveling.
Remember: Bold spices need balance. Offset fiery harissa with cool cucumber slices. Pair tangy tamarind with sweet roasted carrots. Your meal plan becomes an edible atlas – one delicious bite at a time.
Troubleshooting Shrimp Meal Prep Challenges
Even the most organized cooks face curveballs. I learned this during a client consultation when perfectly seasoned shellfish turned tough overnight. Let’s tackle common hiccups with solutions that keep your meals on track.
Avoiding Overcooking and Texture Loss
That rubbery texture? It often starts at the stove. Use medium heat in your skillet – high temps squeeze out moisture. Cook in batches if needed, giving each piece breathing room. Watch for the curl: When edges form a loose “C” shape, they’re done (usually 90 seconds per side).
| Issue | Quick Fix | Tool |
|---|---|---|
| Dry shellfish | Add broth while reheating | Nonstick skillet |
| Soggy veggies | Store separately from grains | Divided container |
Leftovers feeling bland? Revive them with a sprinkle of onion powder or smoked paprika. These pantry staples add depth without altering cooking times.
Common Reheating Adjustments
Microwave mishaps vanish with one trick: Layer sauce at the container’s base. As it warms, steam keeps everything tender. For skillet revival, heat 1 tsp oil until shimmering, then toss constantly for 60 seconds max.
“Treat reheated shellfish like delicate herbs – warm through, don’t recook.”
Fridge storage matters more than you think. Place cooked items in airtight containers within two hours. Layer salad greens on top to prevent wilting. Couscous and similar grains stay fluffy when stored flat.
Essential Tools and Time-Saving Techniques
The right tools turn kitchen chaos into calm efficiency. During a hectic week of back-to-back client meals, I discovered my heavy skillet could sear shellfish and roast veggies without a wash in between. Smart gear choices cut cleanup time by half while keeping flavors vibrant.
Gadgets That Earn Their Counter Space
Start with a 12-inch cast iron skillet. Its even heat distribution prevents hot spots that ruin delicate seafood. Bonus? You can transfer it straight from stove to oven for roasted veggies or baked chicken.
| Tool | Key Benefit | Time Saved |
|---|---|---|
| Sharp Chef’s Knife | Uniform cuts for even cooking | 8 min/meal |
| Divided Glass Containers | Prevent flavor mingling | 3 min/day |
| Microplane Grater | Fresh zest in seconds | 2 min/sauce |
Batch cooking thrives with stackable containers. Look for ones that go from freezer to microwave safely. I prefer rectangular shapes – they fit more portions in the fridge without Tetris skills.
“Invest in three multi-taskers: a quality skillet, sharp knife, and airtight containers. They’ll handle 90% of your weekly cooking.”
Use your rice cooker’s delay timer. Load grains before bed, wake to fluffy jasmine or brown rice. Add shrimp or chicken later for instant protein. A quick wipe cleans the nonstick bowl.
Multi-functional tools win the space race. My immersion blender purees soups, whips dressings, and even mixes spice rubs. Less clutter means faster prep – and fewer dishes hiding in the sink.
Mastering your kitchen routine starts with smart choices. Properly reheated shellfish keeps its texture when you follow the golden rule: gentle heat and quick flips. Batch cooking shines when you mix bold flavors – think zesty lime or smoky paprika blends. Ever tried a Nashville-inspired seasoning? It transforms basic bowls into crave-worthy meals.
Keep meals exciting by rotating sauces and grains. A squeeze of citrus or sprinkle of garlic powder revives leftovers without extra work. Balanced bowls pair fluffy rice with crisp veggies – fuel that satisfies without weighing you down.
The right tools make all the difference. Divided containers prevent sogginess, while a trusty skillet ensures even heating. As I tell my cooking students: “Prep should empower, not exhaust.”
Take these tips and make them yours. Swap ingredients, experiment with global spices, and find joy in the process. Your kitchen adventures start now – one flavorful bite at a time.
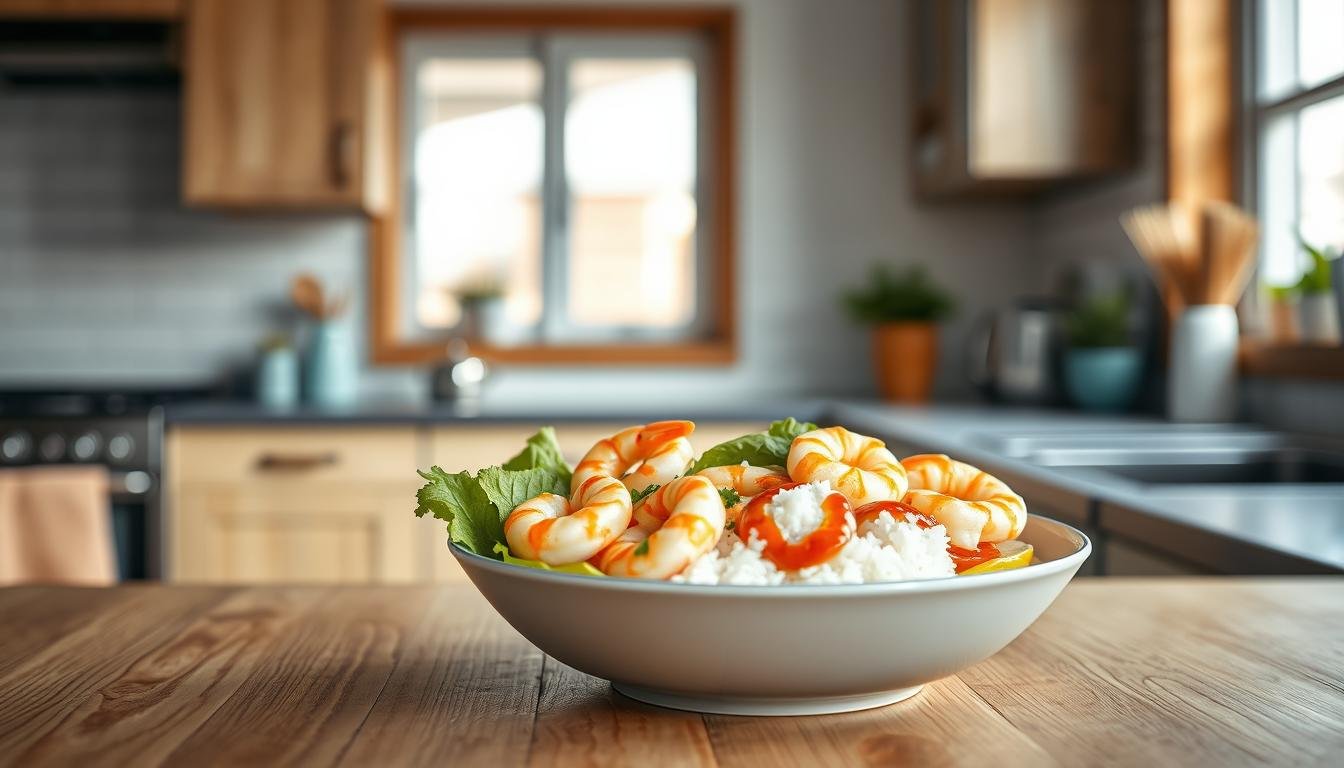
Garlic Lime Shrimp Meal Prep Bowls
A zesty and protein-packed meal prep option featuring sautéed garlic lime shrimp served over cilantro lime brown rice, complemented with cherry tomatoes and jalapeños for a flavorful kick.

Nutrition Information
Equipment Needed
- Medium saucepan
- Large skillet
- Cutting board
- Chef's knife
- Measuring cups and spoons
- Wooden spoon
Ingredients
-
1 cup brown rice
-
2 cups low-sodium chicken broth
-
1 tablespoon olive oil
-
1 small onion, diced
-
2 cloves garlic, minced
-
1/4 teaspoon sea salt
-
1 tablespoon fresh lime juice
-
1 teaspoon lime zest
-
2 tablespoons chopped fresh cilantro
-
1 pound jumbo shrimp, peeled and deveined
-
1/4 teaspoon black pepper
-
1 cup cherry tomatoes, halved
-
1 jalapeño pepper, sliced
Instructions

Recipe Video
Garlic Lime Shrimp Meal Prep Bowls
Learn how to make flavorful garlic lime shrimp meal prep bowls with cilantro lime rice, perfect for a healthy lunch option.