Freezer Breakfast Sandwiches Texture Contrast For Eating Satisfaction
Get your mornings started with our easy-to-follow guide on making freezer breakfast sandwiches with texture contrast. Prep ahead, enjoy all week!
Three weeks ago, I nearly burned my last slice of toast while scrambling eggs and answering work emails. That’s when I finally cracked the code: a stash of ready-to-heat morning meals that actually taste fresh. Turns out, the secret wasn’t waking up earlier—it was leaning into smart freezer prep.
Through trial-and-error (and plenty of Instagram DM exchanges with fellow meal preppers), I discovered how to lock in that perfect combo of crispy edges and pillowy-soft centers. These handheld wonders became my weekday lifeline—no more sad desk muffins or rushed drive-thru stops. The best part? Every bite feels thoughtfully crafted, not reheated.
Here’s what makes this approach stick:
- Flavor that survives the thaw: Components stay distinct instead of turning mushy
- 10-minute assembly magic: Batch-building becomes almost meditative
- Community-tested hacks: Borrowed wisdom from real kitchens, not fancy cookbooks
I’ll walk you through the exact layering techniques and ingredient swaps that transformed my AM routine. Because good mornings shouldn’t depend on having extra time—just a little freezer real estate and the right know-how.
Freezer Breakfast Sandwiches
Last month, I accidentally served my niece cold cereal three days straight during her school play crunch time. That’s when I fully committed to pre-assembled morning meals. What changed everything? Discovering how a well-built handheld dish can carry you through chaos while tasting like you fussed over the stove.

Why Your Future Self Will Thank You
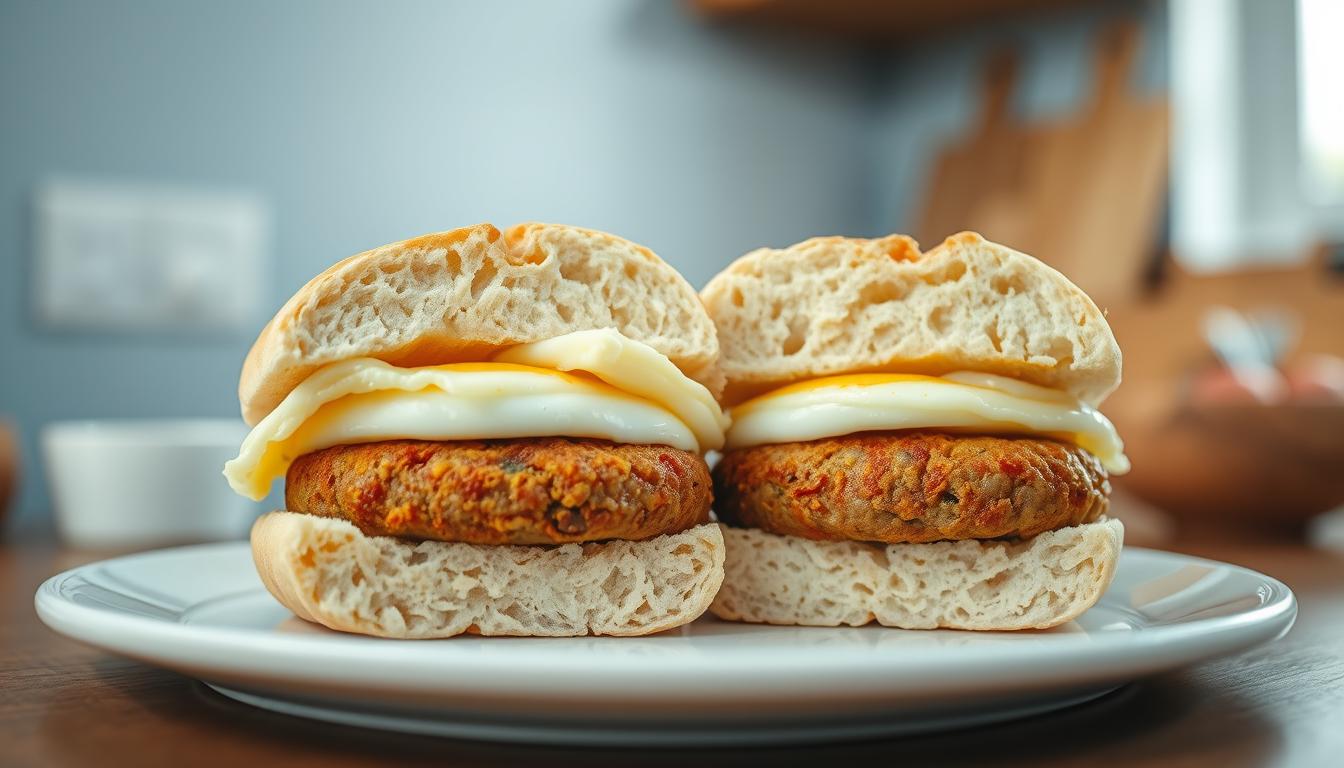
English muffins became my MVP after testing six bread types. Their nooks hold melted sharp cheddar better than bagels, and they toast evenly straight from cold storage. Here’s what makes this approach stick:
- Flavor layers that work overtime: Creamy avocado smashes pair with peppery arugula, while fluffy scrambled eggs act as edible glue
- Ingredient alchemy: Using full-fat dairy prevents that weird rubbery feel when reheating
- Swappable foundations: Gluten-free waffles or croissants work if you’re feeling fancy
During my recipe testing phase (read: two weeks of bemused family taste-testers), I learned that patting cooked eggs dry with paper towels prevents sogginess. This trick, combined with grating your own cheese, transforms basic components into something special. My go-to formula now includes a dash of smoked paprika in the egg mix – it adds depth without overpowering.
What surprised me most? How these become more than food. They’re edible permission slips to hit snooze once more, knowing you’ve already won the morning.
Achieving freezer breakfast sandwiches texture contrast
I once pulled a tray of baked eggs from the oven only to watch them transform into rubber pucks. That disaster taught me texture lives in the margins – 30 seconds can separate pillowy from parched. Here’s how to nail the balance.

For eggs that stay tender after freezing, pull them before they look fully set. I bake mine at 325°F until the edges just lift from the pan. A whisper of steam when you slice through? Perfect – that moisture reanimates during reheating.
Seasoning becomes your secret weapon. Fresh cracked black pepper does double duty:
- Adds gentle heat without overwhelming
- Creates tiny flavor bursts against creamy elements
- Helps cut through rich meats like bacon
Speaking of meats – sausage patties taught me about structural integrity. Pre-cook them 80% done to avoid shrinkage later. Ham needs pat-drying with paper towels before assembly. And bacon? Bake it between parchment sheets for flat strips that layer neatly.
My aha moment came when testing baking times. Thinner egg layers reheat faster than chunky frittata-style. Now I use a quarter sheet pan for uniform thickness. Those golden edges from proper baking become textural landmarks – like flavor roadmaps in every bite.
Prepping and Assembling the Ingredients
Last summer, I ruined a batch of egg muffins by skipping one crucial step—they welded themselves to the pan like edible concrete. Now I keep these three items front-and-center: a rimmed baking sheet, parchment paper sheets, and a butter knife for ingredient spreading. Trust me, they’re game-changers.

Essential Ingredients and Tools
Gather these basics before you start:
| Tool | Purpose | Pro Tip |
|---|---|---|
| Quarter sheet pan | Ensures even egg thickness | Preheat oven to 325°F for optimal baking |
| Parchment paper | Prevents sticking during assembly | Cut sheets larger than your bread for easy wrapping |
| Plastic wrap | Creates airtight freezer seal | Use press-and-seal technique to avoid ice crystals |
“Organization is the difference between a 15-minute assembly and an hour-long scavenger hunt.”
Step-by-Step Assembly Process
- Prep surfaces: Lay parchment paper across your workspace—it catches spills and lets you slide finished wraps directly into the pan
- Layer smart: Place cheese directly against warm ingredients (like freshly cooked sausage) to activate melting during reheating
- Wrap tight: Fold parchment paper like a burrito, then secure with plastic wrap. The double layer prevents freezer burn while keeping flavors distinct
My cousin once asked why her sandwiches tasted “flat”—turns out she’d layered all ingredients in the center. Now I teach the edge-to-edge method: spread each component within half-inch of the bread’s perimeter. It creates balanced bites and prevents slippage.
Baking and Reheating Techniques for Consistent Texture
Three years back, I nuked a perfectly good egg patty into something resembling a hockey puck. That’s when I realized: reheating isn’t just warming food—it’s an art form. The right approach preserves every crispy edge and melty pocket.

Heat It Right, Bite After Bite
Your appliance choice changes everything. For oven reheating:
- Preheat to 375°F
- Wrap sandwiches in foil (shiny side in)
- Bake 18-20 minutes for golden results
Microwave warriors, listen up. Dampen a paper towel, wrap your meal, and use 50% power. Two minutes, flip, then 90 seconds more. This stops rubbery eggs better than any fancy gadget.
| Method | Time | Texture Perks |
|---|---|---|
| Oven | 20 minutes | Crispy bread, melty cheese |
| Microwave | 3.5 minutes | Steamy-soft interior |
“The paper towel trick saved my sanity—and my breakfasts.”
Make sure your egg slices match your bread size. Too thick, and centers stay cold. Too thin, they vanish. Aim for ¼-inch cuts—they reheat evenly without drying out. And always let sandwiches rest 90 seconds post-heating. Those extra moments let flavors settle like a good marinade.
Timing’s everything. Set phone alerts if needed. One minute over, and you’re back to hockey puck territory. Nail it, though? You’ve got brunch-worthy bites faster than brewing coffee.
Customizations and Variations for Every Taste
My kitchen turned into a mad scientist’s lab last fall when I tried replacing cheddar with pepper jack in six batches. The fourth attempt taught me something vital: every tweak needs purpose. Now I approach swaps like puzzle pieces—each change should click with others.

Healthy Ingredient Swaps
Turkey sausage became my gateway to lighter meals. Mix it with fennel seeds and smoked paprika to mimic pork’s richness. For cheeses, sharp cheddar adds boldness while pepper jack brings subtle heat. Both melt beautifully when layered against warm ingredients.
Try these smart switches:
- Swap 80/20 beef for ground chicken seasoned with garlic powder
- Use mashed avocado instead of mayo for creaminess
- Add roasted red peppers for veggie crunch
A reader from our Prepistry community shared her genius move: sprinkling salt directly on tomato slices before assembly. “It draws out moisture so your bread stays crisp,” she noted. This tiny step prevents sogginess better than any fancy gadget.
Exploring Alternative Bread Options
Croissants transformed my meal prep game after a Parisian friend challenged my English muffin habit. Their buttery layers catch melted cheese like edible nets. For gluten-free needs, sweet potato toast works surprisingly well—just bake slices on a sheet until edges curl.
| Bread Type | Prep Tip | Best Pairing |
|---|---|---|
| Bagels | Toast before freezing | Smoked salmon + dill cream |
| Corn tortillas | Warm briefly before rolling | Black beans + cotija |
Remember: your sheet pan is the unsung hero. Line it with parchment when freezing croissants or bagels to prevent sticking. Those golden, flaky layers deserve protection.
Last Tuesday, my neighbor texted: “How do yours taste fresh after freezing?” I grinned while wrapping my tenth croissant-based creation. The answer? Strategic layering and smart storage.
Keep parchment paper handy for assembly—it prevents sticking better than any spray. When you make freezer meals your ally, mornings transform. Measure seasoning with a teaspoon (not eyeballing) to balance flavors without excess fat. Those perfectly slices cooked eggs? They’re your edible insurance against rushed days.
Three game-changers from my kitchen:
- Label every package with reheating times
- Rotate stock weekly for optimal freshness
- Trust your taste buds when customizing
Our meal prep community proves daily that great meals needn’t be complicated. Your future self will high-five you when biting into that crispy-yet-tender masterpiece. Now go claim your mornings—one parchment-wrapped bundle at a time.
Freezer-Friendly Kimchi Egg & Cheddar Breakfast Fold-Ups
A bold, savory breakfast wrap featuring fluffy scrambled eggs, sharp cheddar, and spicy kimchi—perfectly portable and freezer-ready for busy mornings.

Nutrition Information
Equipment Needed
- nonstick skillet
- spatula
- mixing bowl
- whisk
- measuring cups
- freezer-safe wrap (foil or parchment)
- freezer bags
Ingredients
-
4 large eggs
-
1/4 cup milk
-
1/2 cup shredded sharp cheddar cheese
-
1/2 cup chopped kimchi (drained)
-
1 tablespoon unsalted butter
-
4 whole wheat tortillas (8-inch)
-
Salt and pepper to taste
Instructions

Recipe Video
Freezer-Friendly Kimchi Egg & Cheddar Breakfast Fold-Ups
Learn how to make these delicious and convenient freezer-friendly breakfast fold-ups packed with kimchi, eggs, and cheddar cheese.