Freezer Breakfast Sandwiches Bulk Preparation For Monthly Supply
Learn how to make freezer breakfast sandwiches in bulk with our simple guide. Prep your monthly supply with ease and start your day off right with a delicious, grab-and-go breakfast.
What if one kitchen project could save you 30 rushed mornings? I learned this lesson the hard way after burning my third pan of scrambled eggs during a chaotic week. Now, I spend one afternoon each month building a stash of hearty, customizable handheld meals that keep my family fueled.
Creating a month’s supply of grab-and-go options isn’t just efficient—it’s liberating. My favorite approach uses baked eggs (no more rubbery textures!) and crispy English muffins as the foundation. You can swap in turkey sausage, veggie patties, or even leftover roasted veggies. The freezer becomes your ally here, locking in freshness without turning everything into an ice block.
Through testing dozens of methods, I’ve found three secrets: parchment paper between layers prevents sticking, a quick toast-reheat combo restores crunch, and labeling prevents “mystery meat” surprises. Whether you’re feeding teens before school or needing a reliable desk meal, this strategy adapts to your life.
Introduction to Freezer Breakfast Sandwiches
That frantic dance between coffee mugs and burnt toast? I’ve waltzed that routine too many times. Then I discovered the power of stashing ready-to-heat meals behind the ice trays. My game-changer: handheld morning fuel that actually tastes good after freezing.

Why Morning-You Will Thank Night-You
Prepped meals transform rushed decisions into grab-and-go wins. You control ingredients without staring at the fridge in pajamas. My neighbor Jen (mother of three hockey players) calls these her “emergency buttons” for school mornings.
| Morning Scenario | Traditional Approach | Make-Ahead Advantage |
|---|---|---|
| 6:45 AM | Scrambling eggs while packing lunches | Reheat & enjoy in 90 seconds |
| Diet Needs | One-size-fits-all breakfast | Custom cheese blends, protein swaps |
| Cost | $8 drive-thru sandwiches | $1.75 per homemade portion |
Crafting Your Foundation
The magic starts with texture contrasts. English muffins stay crisp when you bake eggs in a lipped pan (my 9×13 stoneware works perfectly). Pro tip: undercook eggs slightly—they finish cooking during reheating. Layer sharp cheddar between warm components to create a flavor glue.
I learned the hard way that soggy bread ruins everything. Now I toast muffin halves before assembling. For 40 sandwiches last month, I used:
- 18 eggs (whisked with a pinch of turmeric)
- 2 packs whole-grain muffins
- 1 lb sharp white cheddar
Key Ingredients and Equipment Essentials
The right foundation turns chaotic mornings into calm victories. Let’s talk about building blocks that hold up through freezing and reheating—no sad, soggy results allowed.

Must-Have Ingredients
Fresh eggs bind everything together—I use 18 for 12 portions. Skip the pre-shredded cheese; block cheddar melts better without anti-caking additives. Whole-grain muffins (toasted first!) maintain structure better than plain varieties. For a tested formula, try this balanced recipe that nails flavor and texture.
| Ingredient | Standard Choice | Premium Upgrade | Why It Matters |
|---|---|---|---|
| Eggs | Large, grade A | Pasture-raised | Richer flavor, brighter yolks |
| Cheese | Pre-sliced | Hand-cut blocks | No cellulose coating |
| Muffins | Store brand | Sourdough | Better crumb structure |
Recommended Kitchen Tools
A sturdy muffin tin creates uniform egg rounds—I ruined three batches before switching to nonstick. Use parchment sheets between layers during assembly. My $12 bench scraper cuts prep time by slicing eight cheese portions at once.
Baking sheets matter more than you’d think. Thin warped pans caused uneven cooking until I invested in commercial-grade aluminum. Now each egg layer cooks evenly, and cleanup takes half the time.
Prepping the Components for Success
Mastering component prep turns kitchen chaos into clockwork efficiency. Let’s focus on two pillars: perfectly textured eggs and crisp muffin bases. Trust me—I’ve served hockey-puck eggs before learning these tricks.

Baking the Eggs to Perfection
Whisk 18 eggs with a splash of milk in a mixing bowl. Pour into a greased 9×13 pan lined with parchment paper. Bake at 325°F for 14-16 minutes—eggs should jiggle slightly when shaken. Let them rest 5 minutes before slicing into squares.
| Method | Temp | Time | Result |
|---|---|---|---|
| Standard Bake | 325°F | 15 min | Tender, sliceable |
| Convection | 300°F | 12 min | Fluffier texture |
| Glass Dish | 335°F | 17 min | Golden edges |
Toasting and Assembling the English Muffins
Split muffins and toast cut-side up on a baking sheet at 375°F for 6 minutes. Cool completely before stacking with cheddar and egg. Pro tip: Place cheese between warm egg and cool muffin to prevent sogginess.
Use these timing guidelines for multitasking:
- Start muffins when eggs enter oven
- Rotate baking sheets halfway through
- Check eggs at 12 minutes with toothpick test
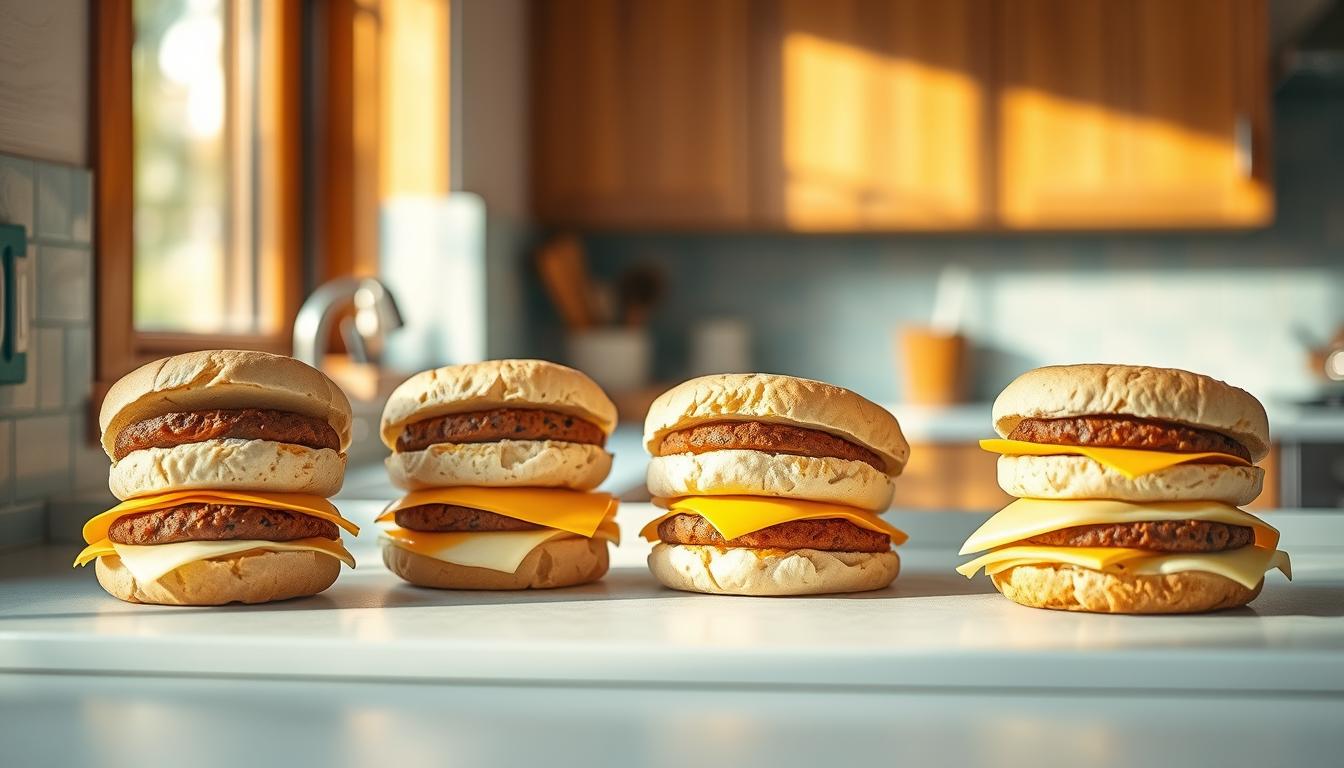
Freezer Breakfast Sandwiches Bulk Preparation
Your kitchen counter becomes a production line for delicious efficiency. Let me walk you through the assembly rhythm that transformed my chaotic prep days into smooth operations. Last month, I timed myself assembling 24 portions in 18 minutes flat—here’s how.

Step-by-Step Assembly Process
Grab cooled muffin halves and lay them cut-side up. Place cheese first—it acts as a moisture barrier. Add egg squares slightly off-center for even distribution. Top with pre-cooked protein or veggies, then crown with the second half. Press gently—you want cohesion without smashing.
“Proper wrapping is the difference between fresh-tasting and frost-bitten meals.”
| Wrapping Material | Cost per Sandwich | Ease of Removal | Freezer Performance |
|---|---|---|---|
| Parchment Paper | $0.03 | Easy | Prevents ice crystals |
| Aluminum Foil | $0.07 | Moderate | Risk of sogginess |
| Plastic Wrap | $0.02 | Difficult | Traps moisture |
Freezing Techniques and Storage Tips
Wrap each creation tightly in parchment—I learned this after losing three sandwiches to wax paper adhesion. Stack them vertically in gallon bags labeled with dates. For best results:
- Freeze within 30 minutes of assembly
- Remove air from storage bags
- Use within 6 weeks for peak quality
When hunger strikes, microwave at 50% power for 90 seconds. For crunch lovers: 30 seconds in the microwave + 2 minutes in the toaster oven. Always check the center’s temperature reaches 165°F.
Creative Variations and Healthier Options

My sister once asked, “Why eat the same meal daily when you could taste the rainbow?” That question sparked my journey into remixing handheld meals. Small swaps can transform your morning routine without extra effort.
Substituting for Whole-Grain and Low-Cholesterol Choices
I learned the hard way that regular bread turns gummy after freezing. Now I use sprouted-grain muffins—their sturdy texture holds up beautifully. For lower cholesterol, try this trick: whisk two egg whites with a quarter cup of cottage cheese per portion. It creates a fluffy base with 40% less saturated fat.
| Original | Swap | Benefit | Prep Tip |
|---|---|---|---|
| White English muffin | Whole-wheat pita | Higher fiber | Toast before assembling |
| Pork sausage | Mashed black beans | Plant protein | Season with smoked paprika |
| Cheddar cheese | Whipped ricotta | Lower sodium | Mix with fresh herbs |
Adding Vegetables and Alternative Meats
Roasted red peppers changed my game—their sweetness balances savory elements perfectly. Use a cup to measure chopped spinach (squeeze out moisture first!) or sautéed mushrooms. For protein lovers, turkey bacon or crumbled tempeh works better than you’d expect.
Last month, I prepped three flavor profiles using the same base ingredients:
- Mediterranean: Sun-dried tomatoes + feta
- Southwest: Poblano peppers + turkey chorizo
- Garden Fresh: Zucchini ribbons + goat cheese
Store veggie-heavy versions in a labeled bag with parchment between layers. Follow reheating instructions carefully—leafy greens release moisture when thawed. A quick toast restores that satisfying crunch.
Reheating and Serving Suggestions
I’ll never forget the morning I zapped a perfectly good handheld meal into a rubbery mess. Turns out, reheating frozen creations requires more finesse than slapping buttons. Here’s how to revive your morning fuel without sacrificing texture or flavor.

Microwave and Toaster Oven Methods
For speed: Unwrap your meal and wrap it in a damp paper towel. Microwave at 50% power for 90 seconds—this gentle heat prevents cheese explosions. Check the center reaches 165°F with a quick thermometer poke.
Craving crunch? Use a baking sheet in the toaster oven. Lightly coat the base with cooking spray, then bake at 375°F for 8 minutes. Flip halfway for even crisping. As the Prepistry team advises: “Low and slow beats high heat for texture rescue missions.”
| Method | Time | Texture | Best For |
|---|---|---|---|
| Microwave | 90 sec | Soft | Rushed mornings |
| Toaster Oven | 8 min | Crispy | Leisurely days |
Optional Finishing Touches for Freshness
Add bright flavors after reheating. A dollop of Greek yogurt or slice of avocado brings freshness without wilting. My go-to upgrades:
- Quick-pickled onions (5-minute brine)
- Everything bagel seasoning sprinkle
- Drizzle of sriracha mayo
Store leftover wrap sandwich versions in parchment rather than foil—the steam escape keeps tortillas from turning gummy. For egg-forward meals, a light cooking spray on the baking sheet prevents sticking during oven revivals.
Conclusion
There’s a quiet pride in opening your freezer to see neat rows of handheld meals ready to conquer chaotic mornings. After years of trial and error (including that infamous “pepper avalanche” incident), I’ve learned that smart prep transforms rushed moments into something resembling calm. A sharp cheddar cheese slice or smoky bacon crumble isn’t just flavor—it’s a tiny act of morning kindness to yourself.
Assembling these creations becomes almost meditative once you find your rhythm. Whether you layer ham from Sunday’s roast or sprinkle freshly cracked pepper over eggs, each choice personalizes your fuel. My favorite meal prep breakfast sandwich recipe proves that good food doesn’t require hours—just intention.
What stays with me isn’t the time saved (though that’s glorious). It’s watching my niece devour her customized veggie version, or my partner finally skipping drive-thru lines. These meals become silent partners in life’s hustle, whispering: “You’ve got this.”
So grab your ingredients and trust the process. Every wrapped sandwich marks a small victory—a promise that tomorrow’s you will feel nourished, capable, and oddly proud of past-you’s foresight. That’s kitchen magic worth repeating.