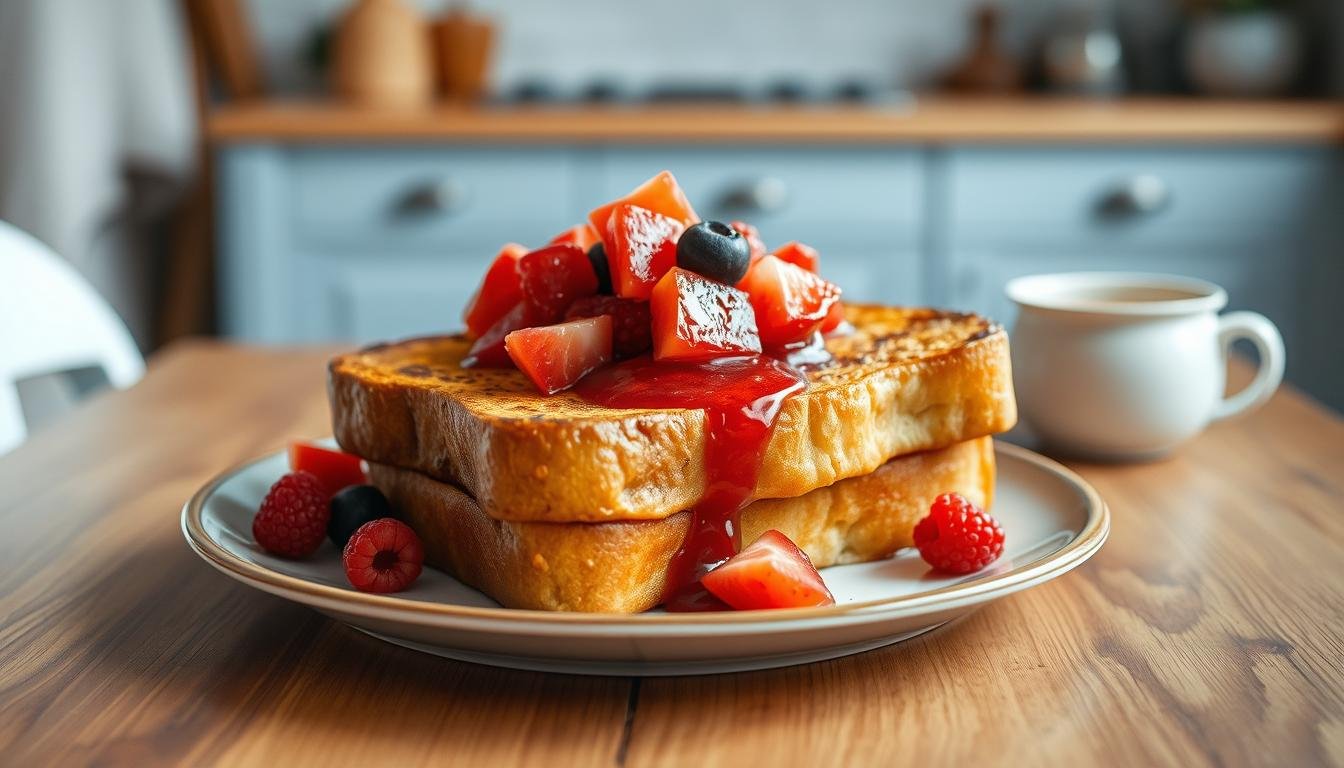
Low Sugar Breakfast French Toast With Fruit Compote
Start your day with my low sugar breakfast french toast recipe, paired with a delicious fruit compote – a no-stress, healthy breakfast idea!
What if I told you a cozy, golden-brown morning treat could taste indulgent and keep things light? As Chef Callie, I’ve burned more slices than I’d like to admit—but this version? It’s the one I make weekly. Thick-cut sourdough soaked in a creamy blend of eggs and almond milk, kissed with cinnamon, then topped with a vibrant berry compote. No syrup required.
This dish works for hectic weekdays and lazy Sundays. Swap regular bread for gluten-free, use flax eggs for a vegan twist—it adapts to your needs. The compote? Just simmer frozen berries (no added sweeteners) until they burst into jammy goodness. Fiber-rich, naturally sweet, and ready in 15 minutes.
- Balances cozy comfort with smart nutrition
- Customizable for dietary needs (vegan/gluten-free)
- Fruit compote adds flavor without refined sugar
From Burnt Batches to Brunch Bliss
You know that moment when crispy edges meet pillowy centers? That’s what I chased for years—until I realized classic versions left me crashing by mid-morning. My spin keeps the cozy factor but swaps sugar spikes for steady energy. Trust me, after burning one too many batches (hello, smoke alarm serenades), this version became my kitchen triumph.

Here’s the magic: day-old sourdough soaks up a rich custard without turning mushy. The secret? Let it sit just long enough—like that sweet spot between rushed and overdone. Whether you’re juggling emails or savoring slow mornings, this dish adapts. Weekday warrior? Prep the mixture tonight. Lazy Sunday? Let that bread luxuriate in cinnamon-kissed goodness.
“Great meals aren’t about perfection—they’re about joy you can taste.”
New to the stove? No sweat. You’ll need:
- A trusty skillet (nonstick saves the day)
- Frozen berries simmered into jammy compote
- Patience for golden-brown flip timing
Later sections break down each step—from whisking techniques to nailing the flip. But first, let’s gather your ingredients. Spoiler: no fancy gadgets required. Just hands-on comfort, one slice at a time.
Ingredients Overview
Gathering your ingredients is like building a flavor foundation—get this right, and everything else falls into place. Let’s talk about what makes this dish both sturdy and satisfying, starting with the non-negotiables.

Core Ingredients
Hearty bread is your anchor here. Day-old sourdough or whole grain slices hold their shape better than fresh ones (learned that the hard way after a mushy disaster). For the custard, room-temperature eggs blend smoothly into almond milk or oat milk—cold eggs can make the mixture grainy. A dash of vanilla extract adds warmth without sweetness overload.
Here’s a quick guide to milk choices:
| Milk Type | Texture | Flavor Note |
|---|---|---|
| Almond | Light | Nutty undertones |
| Oat | Creamy | Subtly sweet |
| Dairy | Rich | Classic custard |
Optional Toppings and Extras
This is where you make it yours. Fresh berries add brightness, while a spoonful of Greek yogurt gives tangy contrast. Skip the syrup—mashed banana or chopped nuts bring natural richness. My go-to combo? Toasted coconut flakes + lime zest. It’s like a tropical vacation on your plate.
- Fruit: Blueberries, sliced peaches, or roasted apples
- Crunch: Pecans, granola, or chia seeds
- Drizzles: Almond butter or a light honey swirl
How to Prepare Your French Toast
The secret to custard-rich slices lies not in fancy tools but in three simple steps. I learned this after ruining half a loaf—turns out, patience beats perfection every time.

Step-by-Step Process
Start with the base: Crack eggs into a shallow dish and whisk together with milk until smooth. Add cinnamon or nutmeg—this is where the magic begins. No clumps allowed!
Soak smartly: Dip bread slices into the egg mixture for 15-20 seconds per side. Thick-cut sourdough? Give it 25. Watch for even absorption—glossy surfaces mean you’re golden.
| Bread Type | Soak Time | Texture Result |
|---|---|---|
| Sourdough | 25 sec/side | Crisp exterior |
| Whole Grain | 20 sec/side | Firm center |
| Brioche | 15 sec/side | Buttery soft |
Heat matters: Preheat your pan to medium—not smoking, not lukewarm. Test with a water droplet; it should sizzle gently. Cook 3-4 minutes per side until golden brown crusts form.
Work in batches if needed—crowding leads to steamed bread. Keep finished slices warm in the oven (200°F) while you finish. Pro tip: Let the mixture settle between dips for even coating.
Remember: Rushing leads to raw centers. Slow and steady gives that perfect crisp-tender balance we all crave.
Crispy outside, creamy inside? That’s the goal—but don’t forget: letting bread sit too long can lead to soggy sadness, not brunch victory.
Crafting the Fruit Compote
There’s a moment when berries hit the pan—that sizzle that promises something sweet. I’ve scorched pans forgetting this truth: great compote starts with patience, not perfect fruit. Let’s turn your kitchen into a flavor lab where even slightly bruised peaches shine.

Choosing Your Stars
Seasonal picks win every time. Summer? Grab raspberries or stone fruits. Winter? Citrus or frozen mixes work wonders. Look for fruit that’s fragrant—even if it’s soft. Overripe isn’t bad here; it’s gold for natural sweetness.
| Fruit Type | Best Season | Flavor Boost |
|---|---|---|
| Berries | Spring/Summer | Add lemon zest |
| Apples | Fall | Cinnamon stick |
| Citrus | Winter | Vanilla bean |
Simmering Secrets
Medium heat wakes up flavors without burning. Toss fruit in your pan dry—no oil needed. Let them release juices first, then stir gently. A pinch of cinnamon? It’s like adding a cozy blanket to the mix.
If your stove runs hot, finish in a 275°F oven. Spread fruit on a baking sheet—10 minutes max. This slow-roast trick deepens flavors without mushiness. Cool 5 minutes before serving; warmth lets juices cling to each bite.
“Compote isn’t about hiding imperfections—it’s about celebrating what’s already there.”
Sweetness balance? Taste as you go. Start with 1 tsp sugar (or none!), then adjust. Remember: you can add, but you can’t remove. Pair with toast while still warm—the contrast of cool custard and vibrant topping? Chef’s kiss.
Avoid covering the pan! Trapping steam while simmering fruit turns vibrant compote into a dull, mushy mess. Let flavors bloom, not boil.
Detailed Recipe Walkthrough
I once whisked eggs so vigorously they flew onto my apron—lesson learned. Let’s break down the process without the mess. Success lies in three stages: blending, soaking, and cooking with intention.

Mixing the Egg Mixture
Start with room-temperature eggs—cold ones create uneven texture. Whisk them slowly with milk until silky, not frothy. Add cinnamon last to prevent clumping. Pro tip: Strain through a sieve if you spot any lumps. This creates a velvety base that clings to every pore of your bread.
Soaking the Bread Properly
Thick slices need 90 seconds total (45 per side). Press gently to help absorption without tearing. Watch for glossy surfaces—that’s your cue to stop. Over-soaking leads to soggy centers, as I discovered during a brunch disaster last summer.
| Bread Type | Soak Time | Result |
|---|---|---|
| Sourdough | 1.5 mins | Crisp shell |
| Multigrain | 1 min | Chewy bite |
| Brioche | 45 sec | Buttery soft |
Cooking to Golden Perfection
Heat your pan over medium for 2 minutes before adding butter. Cook slices 3-4 minutes per side—lift edges to check color. Too pale? Wait. Too dark? Lower heat. Working in batches keeps the pan from cooling. Stagger them like pancakes at a diner.
“The sizzle should whisper, not scream.”
New cooks often rush the flip. Use a thin spatula—thick ones tear delicate edges. If your first batch burns? Welcome to the club. Adjust and try again. That contrast of crisp crust and tender center? Worth every second.
Essential Tools & Equipment

Ever grab a flimsy spatula mid-flip and regret every life choice? I’ve been there—watching golden edges tear because my tools weren’t up to the task. Let’s talk gear that actually works, not just looks cute on Instagram.
Kitchen Must-Haves
Your pan is everything. A heavy-bottomed nonstick skillet distributes medium heat evenly—no burnt spots or raw centers. Mine’s survived three years of weekly use (and a few distracted TikTok scrolls). Pair it with a thin-edged spatula for clean flips.
Sturdy mixing bowls matter more than you’d think. Glass or stainless steel won’t slip while whisking. For measuring ingredients like almond milk or cinnamon, nesting cups and spoons save cabinet chaos. Bonus: they double for baking projects.
- Oven-ready dishes: Keep cooked slices warm at 200°F while finishing batches
- Shallow dish: Wide enough for bread to soak without crowding
- Timer: Phone alarms work, but a dedicated one prevents over-charring
Pro tip: Line tools up before starting. It turns chaotic mornings into smooth routines. These basics tackle 90% of kitchen tasks—from Sunday pancakes to weeknight protein bowls. No fancy gadgets required.
Tips for Perfect French Toast Texture
We’ve all faced that tragic split-second between golden and burnt—the line thinner than a knife’s edge. Here’s how to nail that crisp shell with a tender heart every time, even when your stove seems rebellious.

Start with pan medium heat. Too hot, and edges char before centers cook. Too low, and you’ll steam instead of sear. Test with a water droplet—it should sizzle softly, not vanish instantly. Adjust as needed; experienced cooks know heat isn’t set-and-forget.
Soaking time? Think of it as a handshake, not a hug. Thick slices need 90 seconds total—any longer risks soggy middles. The egg mixture’s protein acts like edible glue, binding moisture while creating structure. Balance is key: too little custard = dry, too much = mushy.
| Bread Type | Ideal Soak | Result |
|---|---|---|
| Sourdough | 25 sec/side | Crisp & sturdy |
| Whole Grain | 20 sec/side | Chewy core |
| Brioche | 15 sec/side | Silky interior |
Work in batches. Crowding drops pan temperature, leading to uneven browning. If slices stick? Let them cook undisturbed 2 minutes—they’ll release naturally. Burnt first attempt? Scrape the pan, lower heat, try again. My third batch always shines brightest.
Texture troubles? Check your bread. Day-old works best—fresh loaves absorb too quickly. No patience? Toast slices lightly before soaking. It creates a barrier, keeping centers pillowy while exteriors crisp up beautifully.
Using low-fat or watery milk alternatives? Watch your ratio—too thin a custard can slip right off the bread and ghost your golden crust.
Variations and Adaptations
My cousin’s gluten-free challenge taught me more about recipe tweaks than any cookbook. Whether you’re hosting brunch or accommodating dietary needs, these spins keep the soul of the dish intact while bending the rules. Let’s explore how to make this morning favorite work for everyone at your table.
Vegan & Gluten-Free Options
For plant-based versions, swap eggs with a flax mixture (1 tbsp ground flax + 3 tbsp water per egg). Almond milk or oat milk creates the same creamy custard—just add extra cinnamon to amplify flavor. Gluten-free? Use sturdy whole grain bread or certified GF loaves. They hold shape better than airy alternatives during soaking.
Turning the Recipe into a Casserole
Transform individual slices into a crowd-pleasing bake. Cube day-old bread, layer in a dish, and pour custard over it. Let sit overnight—the bread drinks up every drop. Bake at 375°F until golden. Top with fresh berries before serving. Perfect for holidays or meal prep Sundays.
| Recipe Type | Egg Substitute | Milk Option | Prep Time |
|---|---|---|---|
| Classic | Eggs | Dairy or almond | 15 mins |
| Vegan | Flax mixture | Oat milk | 20 mins |
| Casserole | Eggs | Any milk | Overnight + 40 mins |
Vanilla and cinnamon work across all versions—they’re flavor anchors. For extra pizzazz, fold orange zest into the custard or sprinkle toasted pecans post-bake. The beauty? These adaptations let you get creative without losing that cozy, familiar taste.
Remember: Whether you’re dipping bread in a flax blend or prepping a casserole, patience yields the best texture. Your kitchen, your rules—make it deliciously yours.
Serving Suggestions and Toppings
Toppings turn good dishes into great ones—here’s how to elevate yours without guilt. Picture this: golden slices layered with textures that crunch, drizzle, and burst. The key? Let each element shine without competing.
Fresh Fruit Garnishes
Ripe berries or sliced peaches add natural sweetness. For a tangy twist, try kiwi or pomegranate seeds. Pro tip: Toss fruit with lemon juice to keep colors vibrant. Frozen mango chunks thaw quickly and create tropical vibes.
A light maple drizzle bridges flavors beautifully—just 1 tsp per slice. Pair it with toasted coconut flakes for depth. Need crunch? Sprinkle slivered almonds or hemp seeds. They add protein without overpowering.
| Topping Type | Flavor Boost | Prep Time |
|---|---|---|
| Berries | Bright acidity | 0 mins |
| Nut butter | Rich creaminess | 2 mins |
| Granola | Crunchy contrast | 5 mins |
“Balance isn’t about less—it’s about smart combinations.”
Dust with powdered sugar using a fine sieve for snowy elegance. Or skip it—mashed banana adds subtle sweetness. Rotate toppings weekly: Monday’s cinnamon apples, Friday’s citrus zest. Your plate, your canvas.
Expert Secrets for low sugar breakfast french toast
I’ll never forget the morning my “custard masterpiece” turned into bread pudding soup. Turns out, even seasoned cooks need reminders. Let’s talk about bridging the gap between recipe ideals and real-life results.
Rescuing Soggy Slices
Over-soaking’s the silent killer here. Your bread should feel like a damp sponge—not a soaked one. Use this cheat sheet:
| Bread Texture | Max Soak Time | Fix If Overdone |
|---|---|---|
| Dense (sourdough) | 90 seconds | Blot with paper towels |
| Soft (brioche) | 45 seconds | Toast lightly pre-soak |
| Gluten-free | 60 seconds | Use thicker slices |
Heat Control Mastery
Pan medium heat is your North Star. Test it with a water droplet—steady sizzles mean go-time. Uneven browning? Rotate slices every 90 seconds. If edges darken too fast, slide the pan off heat for 30 seconds.
Oven trick: Keep finished pieces at 175°F (not 200°F!) while cooking batches. This gentle warmth maintains texture without drying. My favorite mixing bowl hack? Chill it 10 minutes before whisking—it prevents premature cooking of the egg mixture.
Remember: Your first batch is the sacrificial slice. Adjust heat, soak times, and flip techniques from there. Burnt edges taught me more than any cookbook ever could.
Nutritional Information, Health Benefits, and Storage Guidelines
Let’s talk about what happens after the last bite—how to keep leftovers fresh and why this dish fuels your day without the crash. I once left a batch on the counter overnight (oops), but here’s the smarter way to handle it.
Calorie and Macronutrient Breakdown
Each serving hovers around 275 kcal—enough to satisfy without weighing you down. Here’s where those numbers come from:
| Nutrient | Per Serving | Key Source |
|---|---|---|
| Protein | 12g | Eggs, almond milk |
| Fiber | 5g | Whole grain bread, berries |
| Healthy fats | 8g | Nuts, egg yolks |
Using unsweetened milk cuts added sugars while keeping creaminess. The compote’s natural fruit sugars? They digest slower thanks to fiber—no mid-morning slump.
Refrigeration, Freezing, and Meal Prep Tips
Store cooled slices in an airtight dish for up to 3 days. For longer storage:
- Freeze: Layer between parchment paper—thaws in 15 minutes
- Reheat: Use a toaster or 325°F oven for 8 minutes to revive crispness
- Batch prep: Make custard mixture 2 days ahead; whisk before using
Time-saving notes: Frozen slices go straight into the oven—no thawing needed. Leftover compote? Stir into oatmeal or yogurt for a flavor boost.
Transforming basic ingredients into a morning masterpiece isn’t as hard as it seems—especially with the right tricks. This recipe thrives on simplicity: hearty whole grain slices, your favorite milk (oat works wonders), and a vanilla-kissed custard that skips refined sweetness. The berry compote? It’s nature’s syrup replacement, bursting with flavor you’ll want to drizzle on everything.
What makes this dish special? It bends to your needs. Swap in gluten-free bread, try almond extract instead of vanilla, or top with toasted walnuts for crunch. Every bite balances comfort with smart choices—no post-meal crashes, just steady energy. I’ve seen home cooks turn this base into savory versions with herbs, proving its versatility.
Your kitchen tools matter, but your creativity matters more. Found a new favorite milk blend? Discovered a fruit combo that sings? Share it! Tag me with your twists—I’m always hunting for fresh ideas. Because great meals aren’t about perfection; they’re about joy shared one golden-brown slice at a time.
Start tomorrow with this dish, and watch how a thoughtful breakfast sets the day’s rhythm. Crispy edges, tender centers, and that compote shine—it’s more than a meal. It’s a morning hug you’ll want to repeat.
Cottage Cheese & Veggie Savory Toasts
A protein-rich savory breakfast toast with creamy cottage cheese, roasted veggies, and fresh herbs—perfect for balancing flavor and nutrition without sugar.

Nutrition Information
Equipment Needed
- Toaster or oven
- Small mixing bowl
- Baking sheet
- Spatula or spoon
Ingredients
-
2 slices whole grain or rye bread
-
1/2 cup low-fat cottage cheese
-
1/2 cup cherry tomatoes, halved
-
1/4 cup chopped zucchini or bell peppers
-
1 tsp olive oil
-
1/4 tsp sea salt
-
1/4 tsp black pepper
-
1/8 tsp smoked paprika (optional)
-
Fresh parsley or chives for garnish
-
Red pepper flakes (optional)
Instructions

Recipe Video
COTTAGE CHEESE BREAKFAST TOAST | easy, healthy recipe ideas
Cottage Cheese Breakfast Toast is an easy, healthy recipe idea that is simple to make, packed with protein, and ready in just 5 minutes! An easy, versatile, no-cook breakfast idea that can...