Lunch Meal Prep Temperature Control For Food Safety
Get lunch meal prep temperature control right with our how-to guide. Practical tips for safe food storage and handling.
Did you know your weekly batch cooking routine could secretly harbor food safety risks? I learned this the hard way when my perfectly portioned chicken bowls turned into a science experiment by Wednesday. Through trial and error (and some frantic fridge reorganizing), I discovered heat management makes or breaks your kitchen efforts.
Smart food handling isn’t just about avoiding leftovers-turned-mystery. It’s the key to preserving flavors, textures, and nutritional value. Busy households save nearly 3 hours weekly through strategic planning, but improper cooling or reheating can undo those benefits faster than a toddler discovers the snack drawer.
Let’s explore how to:
- Keep creations safe without constant thermometer checks
- Design efficient routines that protect quality
- Avoid common mistakes that lead to wasted ingredients
Whether you’re new to Sunday cooking marathons or refining your system, these practical guidelines will help you serve up confidence with every container.
Lunch Meal Prep Temperature Control
Ever opened a meal container to find one corner piping hot while another stays cold? That’s your oven playing tricks—and inviting bacteria to the party. What happens between cooking and storing determines whether your creations stay vibrant or become science projects.

The Kitchen’s Invisible Safety Net
Bacteria multiply fastest between 41°F and 140°F—a range I call the “danger zone.” Leftovers cooling on the counter? That’s prime real estate for microbes. I learned this after a batch of turkey chili spent too long at room temp. Let’s just say my stomach wasn’t thrilled.
Three rules keep foods safe:
- Cook proteins to their safe minimums (165°F for poultry)
- Cool dishes from 140°F to 70°F within two hours
- Reheat thoroughly to 165°F—no lukewarm middles
Flavor’s Best Friend (or Worst Enemy)
Your oven’s hot spots aren’t just annoying—they’re quality killers. Roasted veggies might char in one area while staying raw elsewhere. I combat this by rotating pans halfway through cooking. An instant-read thermometer ($15 changed my life) helps verify doneness without guesswork.
Proper heat management preserves textures better than any container hack. Oversteamed broccoli turns mushy at 212°F, while roasted retains crunch at 425°F. It’s not just safety—it’s about enjoying every bite days later.
Essential Food Safety Guidelines for Lunch Prep
What if your food storage habits are silently inviting trouble? I once prepped a gorgeous quinoa salad only to find it suspiciously fizzy two days later. Turns out, I’d left it cooling too long before refrigerating. Let’s prevent those “oops” moments with science-backed strategies.

Recognizing the Temperature Danger Zone (TDZ)
That fizzy quinoa taught me about the 41°F-140°F range where bacteria throw all-night parties. Food safety experts call this the TDZ—and your creations shouldn’t lounge here longer than 6 hours total. I now set timers during cooling phases like my kitchen depends on it (because technically, it does).
Key Cooking and Cooling Practices
Speed matters when handling hot items. After roasting chicken, I spread portions in shallow containers instead of deep bowls. This hack helps hit the critical cooling targets: 140°F to 70°F within 2 hours, then down to 41°F in the next 4.
Three habits changed my routine:
- Stirring soups while cooling releases trapped heat faster
- Dividing large batches into smaller containers prevents warm centers
- Placing hot pans on wire racks accelerates airflow
Every minute counts between cooking and chilling. I keep my thermometer handy for spot checks—not just at meal time, but during storage transitions too. These steps add mere seconds to your process but days to your food’s freshness.
Practical Tips for Controlling Temperature While Meal Prepping
Ever wonder why your weekly dishes taste different by Friday? The secret lies in how you handle ingredients before they hit containers. Through countless kitchen experiments, I’ve found that smart preparation methods make all the difference in quality and safety.

Pre-Cook Strategies for Protein and Vegetables
Grilling six chicken breasts at once? Use your stove’s front burners for searing and back ones for gentle cooking. This creates perfect doneness without dried edges. For roasted veggies, arrange them in single layers on sheet pans—overcrowding leads to steaming instead of caramelization.
| Ingredient | Best Cooking Method | Internal Temp |
|---|---|---|
| Chicken Breast | Stove Sear + Oven Finish | 165°F |
| Broccoli | Sheet Pan Roasting | 425°F Oven |
| Ground Beef | Skillet Browning | 160°F |
Step-by-Step Cooling Techniques
After cooking, spread rice across sheet trays instead of leaving it in pots. For soups, I drop reusable ice wands (frozen water bottles work too) into the pot. Check every 30 minutes:
- Stir contents to redistribute heat
- Move containers to different freezer shelves
- Verify surface temps with your palm
These methods keep foods out of the danger zone while preserving texture. My trusty timer ensures I never get distracted during critical cooling phases—a lesson learned after ruining three batches of chili.
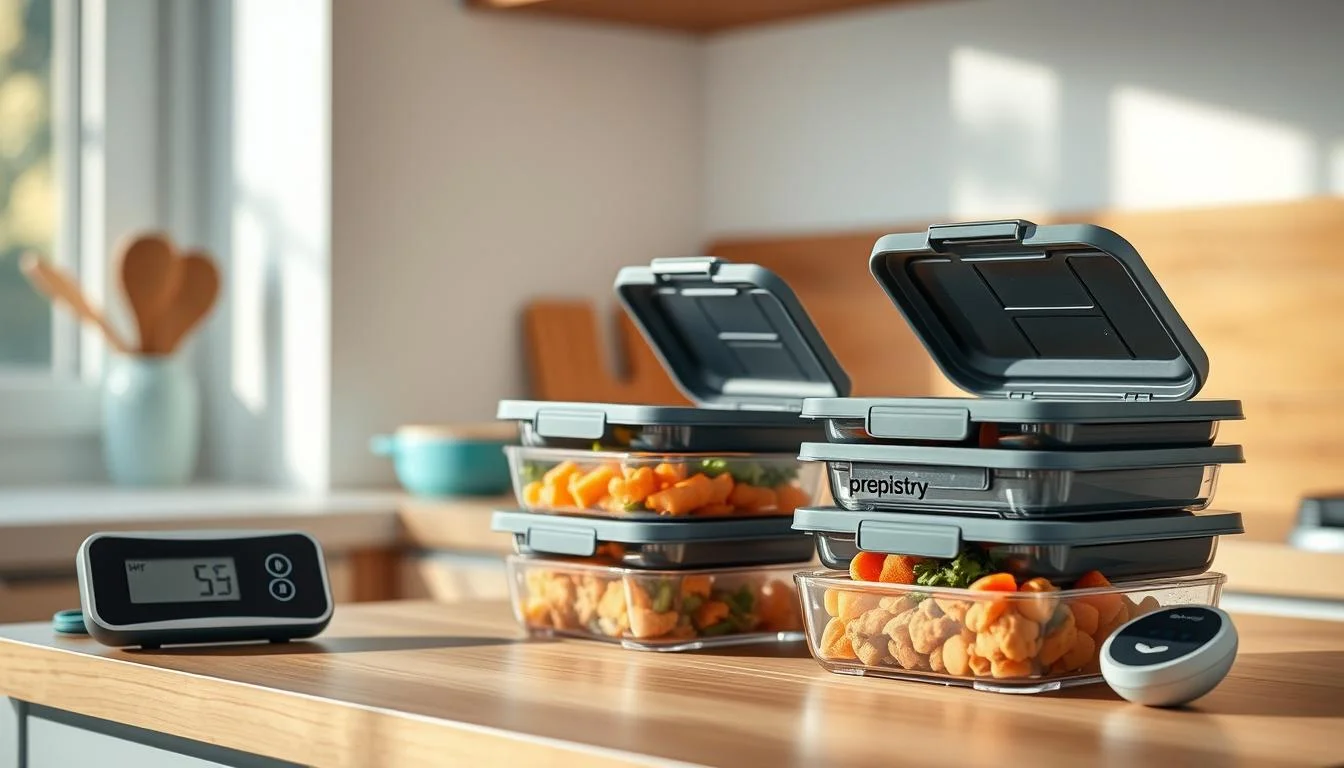
Tools and Techniques for Accurate Temperature Readings
How many kitchen gadgets collect dust in your drawers? I nearly retired my thermometer after a failed pot roast incident—until I discovered proper techniques transform these tools from novelty to necessity. Precision instruments become your kitchen allies when handling proteins and managing multiple pans.

Instant-Read Thermometers: Your Quick-Check Companion
My Thermapen® became indispensable during taco night chaos. Juggling three pans of seasoned ground beef and chicken? Its 3-second read lets me verify doneness without overcooking. Pro tip: Insert the probe sideways into thinner cuts for reliable meat temp checks.
Leave-In Thermometers for Stress-Free Monitoring
When roasting whole chickens or large pork shoulders, my ChefAlarm® stays clipped to the pan. Set target temps, and its alarm signals when proteins reach safe zones—no constant oven-peeking. Bonus: Use it in the fridge to monitor cooling progress for big batches.
Three maintenance musts:
- Calibrate monthly using ice water (32°F)
- Store probes in protective sleeves
- Replace batteries before weekly prep sessions
These tools simplified my routine—no more guessing if quinoa salads cooled sufficiently or worrying about underdone meats. They’re not just for pros; they’re for anyone craving consistency in their containers.
Meal Prep Best Practices: Balancing Time and Temperature
Ever felt like you’re racing against the clock while keeping your creations safe? I once burned garlic roasting vegetables because I rushed cooling to start another batch. Through years of trial (and smoke alarms), I discovered smarter approaches that protect both schedules and food quality.

Efficient Batch Cooking Methods
Organization transforms chaotic cooking into rhythmic efficiency. Chef Thomas Keller famously said,
“Your cutting board is command central—keep it strategic.”
This philosophy works wonders in home kitchens. Start by grouping tasks: roast proteins while chopping veggies, simmer grains during oven preheating.
Three time-tested strategies:
- Par-cook dense vegetables (like carrots) to finish during reheating
- Toss greens with a light oil coating to prevent wilting
- Use divided sheet pans to cook multiple items simultaneously
| Technique | Temp Strategy | Time Saved | Safety Benefit |
|---|---|---|---|
| Sheet Pan Roasting | 425°F convection | 25 mins/batch | Even heat kills surface bacteria |
| Skillet Searing | High heat → oven finish | 15 mins/protein | Crisp exterior locks in moisture |
| Steam-Blanching | 212°F → ice bath | 30 mins/week | Halts cooking at perfect texture |
For busy homes, this practice becomes second nature. I reserve Sunday afternoons for “heat management marathons”—roasting, blanching, and portioning while monitoring temps. A dash of oil on roasted veggies helps them reheat evenly later without drying out.
Time management hack: Set phone timers in 15-minute increments. Rotate pans, check temps, and transition items to cooling stations. This rhythm prevents overcooking while maintaining safety standards. With practice, you’ll streamline work without compromising your hard-earned kitchen control.
Troubleshooting Common Temperature Control Issues
Ever pulled out a container expecting crisp veggies only to find mush? We’ve all faced kitchen hiccups—my infamous over-steamed green beans taught me texture rescue missions are essential. Let’s tackle common challenges with solutions that keep your efforts tasty and safe.

Rescuing Texture and Taste
Dry chicken and soggy grains often stem from reheating mishaps. For proteins, splash broth over the top layer before microwaving. I keep frozen broth cubes in ice trays for this exact purpose—they revive dishes better than takeout ever could.
| Issue | Quick Fix | Prevention Tip |
|---|---|---|
| Overcooked Proteins | Shred + mix with sauce | Check internal temps 5 mins early |
| Uneven Cooling | Stir every 20 mins | Use shallow containers |
| Soggy Vegetables | Pat dry + air-fry 3 mins | Blanch instead of steam |
Your refrigerator‘s top shelf runs colder—perfect for delicate items like dressings. During prepping, cut meats and starches into uniform size for even heating. I once cubed sweet potatoes too large, resulting in crunchy centers—now I measure with a shot glass for consistency.
When comparing to takeout, remember: home-cooked meals let you control moisture levels. Add a damp paper towel over rice containers to prevent drying. Forgot to stir cooling soup? Set a timer next prepping session—we improve through practice, not perfection.
Your journey to stress-free kitchen routines starts with one simple truth: heat management is your silent partner in delicious success. Through countless Sunday cooking sessions, I’ve learned that safe practices protect both your health and your hard work—like keeping roasted vegetables crisp and rice fluffy days later.
Remember these essentials: Thermometers prevent guesswork, shallow containers speed cooling, and batch cooking thrives on organization. Those sheet-pan strategies and quick-cool tricks? They’re game-changers for maintaining quality throughout the week.
Make these habits your kitchen rhythm. Check internal temps while portioning, rotate pans during cooking, and store items strategically. You’ll notice how proper techniques transform leftovers into crave-worthy creations rather than fridge casualties.
Bookmark this guide for your next weekly planning session. With every container you fill, you’re building confidence alongside your menu—one safe, flavorful bite at a time. Now go conquer that kitchen—your future self will thank you!
Cool-Down Sesame Chicken Grain Jars
A refreshing and nutritious meal prep option, these Cool-Down Sesame Chicken Grain Jars combine tender sesame-glazed chicken with wholesome grains and crisp vegetables, all layered beautifully in a mason jar for a convenient grab-and-go lunch.

Nutrition Information
Equipment Needed
- 4 mason jars with lids
- Mixing bowls
- Saucepan
- Whisk
- Knife
- Cutting board
Ingredients
-
2 cups cooked quinoa
-
2 cups cooked brown rice
-
2 cups cooked and shredded chicken breast
-
1/4 cup low-sodium soy sauce
-
2 tablespoons sesame oil
-
1 tablespoon honey
-
1 tablespoon rice vinegar
-
1 teaspoon grated fresh ginger
-
1 garlic clove, minced
-
1 cup shredded carrots
-
1 cup sliced cucumbers
-
1 cup edamame, shelled and cooked
-
1/2 cup chopped red bell pepper
-
1/4 cup chopped green onions
-
2 tablespoons toasted sesame seeds
-
Fresh cilantro leaves for garnish
Instructions

Recipe Video
Sesame Chicken Grain Jar Meal Prep
Learn how to prepare Cool-Down Sesame Chicken Grain Jars, a perfect meal prep solution combining flavorful sesame chicken with wholesome grains and fresh vegetables.